


DIY Live Edge Tables have captured so much attention with their mesmerizing live edge wood slab designs. But, working with epoxy can be daunting for beginners and a huge turn off in even attempting this DIY project at all. At least that is what kept me from doing it for years myself.
If you’re seeking an alternative that’s easier to manage while still achieving the same captivating look, you’re in the right place.
The trend lately is to make anything and everything you can from epoxy. As awesome as that sounds, working with epoxy comes with a lot of challenges. Especially when you are working on a large scale project with it.
Let’s not forget how expensive Epoxy River/Live Edge Tables can be to buy made and ready to go into your home. Are you like me and looked at all the videos you could on how to make one?
If you answered yes to those and discovered this may not be the easiest DIY within your skill set. This blog post will show you exactly how to create your own Non-Epoxy DIY Live Edge Table with simple steps and readily available supplies.
Is epoxy really that difficult to work with?
Prior to this project,I had never worked with epoxy before at all, so working with gallons of it for my first epoxy project didn’t seem like a good idea.
Luckily, I figured out another way around working with epoxy to achieve the same look. Although I wouldn’t say it is a cheaper route, it has a lot less room for error.
Below, you’ll learn exactly how to make your own live edge table the easy way, so that you can make one also if you ever decide you want to!
Supplies Needed to make DIY Live Edge Table:
For this project,you won’t be avoiding epoxy entirely, but you will only be working with small amounts of it at a time.
This project calls for very few tools and skills and I think you’ll be shocked when you realize how doable making one of these tables is!
Shopping List:
- Live Edge Slab(s)
- Steel Base/Metal Table Legs
- Glass Custom Insert (get at your local glass shop)
- Tack Cloth
- Sander
- Sanding Sponge
- Polycrylic Matte Sealer
- Epoxy (small batch)
- Circular Saw
- Router
- Cordless Drill & Drill Bit
Most of these supplies can be easily sourced. In fact, the only one you might have trouble finding is live edge slabs depending on what wood and size you want.
Where do you find live edge slabs?
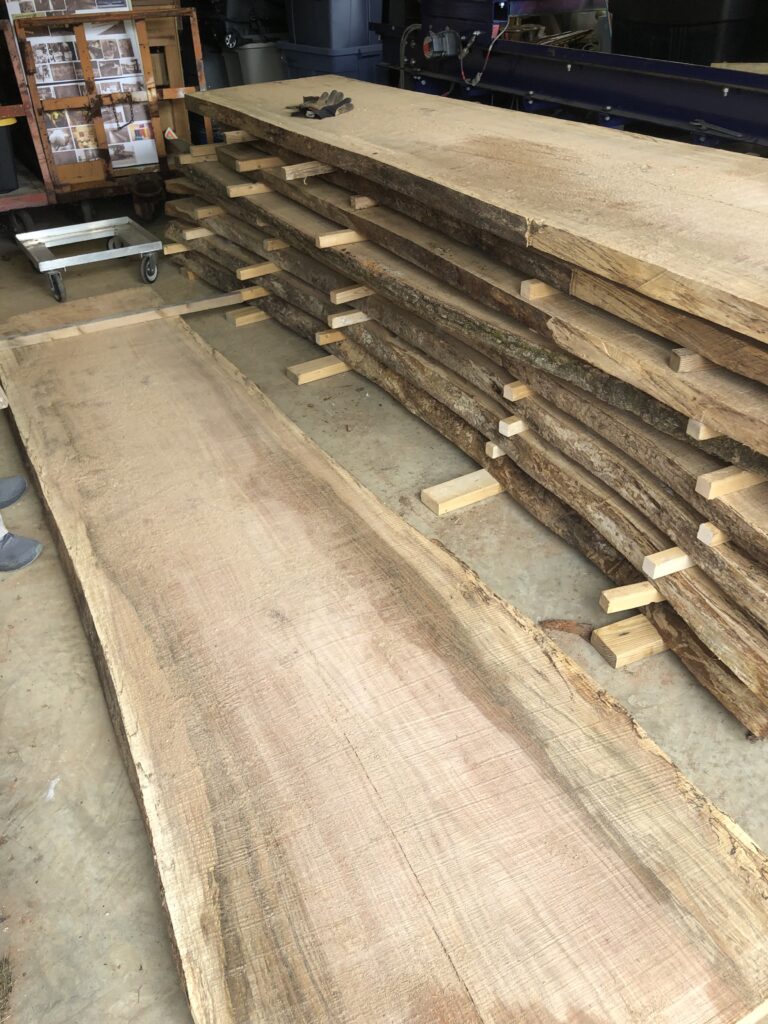
For years you could only go to certain lumber yard or wood workers to find these unique pieces of wood and honestly, I still prefer to go to these sources first to find wood slabs for projects, but I understand these are not readily available for everyone especially if you live in a big city.
In the last couple years, your big box hardware stores, such as Lowe’s and Home Depot, have started carrying these stunning slabs.
I went and checked them out just out of pure curiosity and they had a decent selection! These slabs are already dried and milled for you, which is such a time saver! You also can trust that you are getting a clean piece of wood with no bugs in it since the drying process temps kill off anything living in wood.
How to make your DIY Live Edge Table step-by-step:
Step 1: First thing, you’ll want to decide the height, length and width of the table you want for your space. Below are a few of the most generic sizes frequently used in homes. If you have a custom size you need, that is just fine. No need to follow generic sizes always.
Most Rectangle Tables are between 36” – 40” wide
4 person table – 48” long
4-6 person table – 60” long
6-8 person table – 78” long
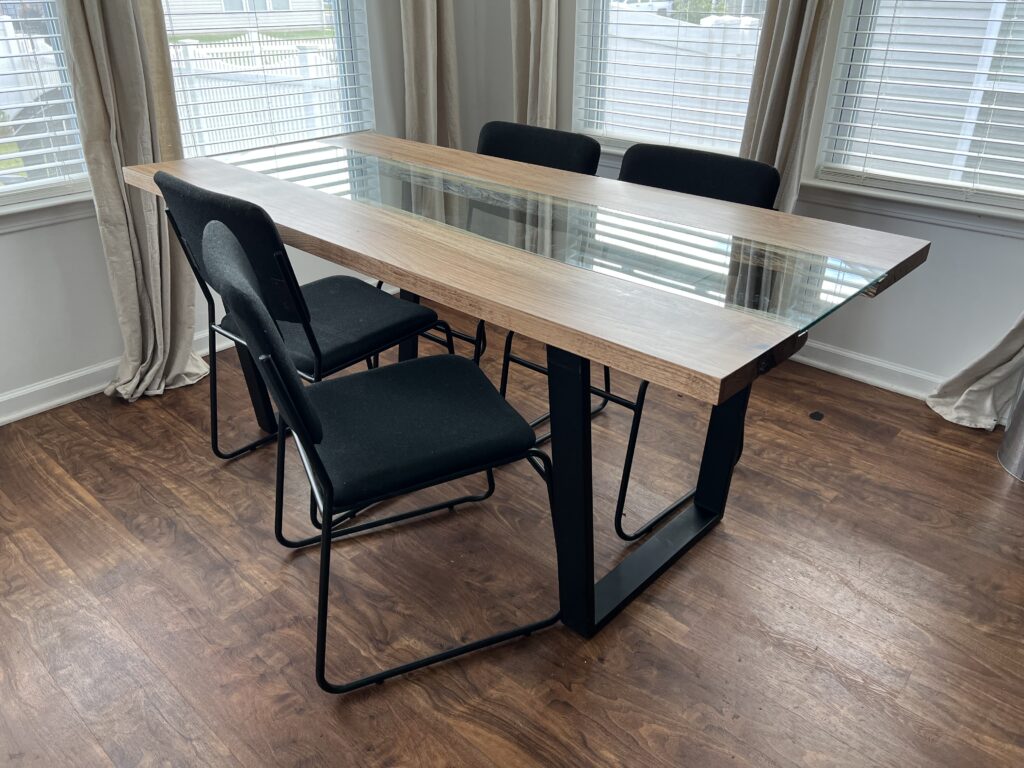
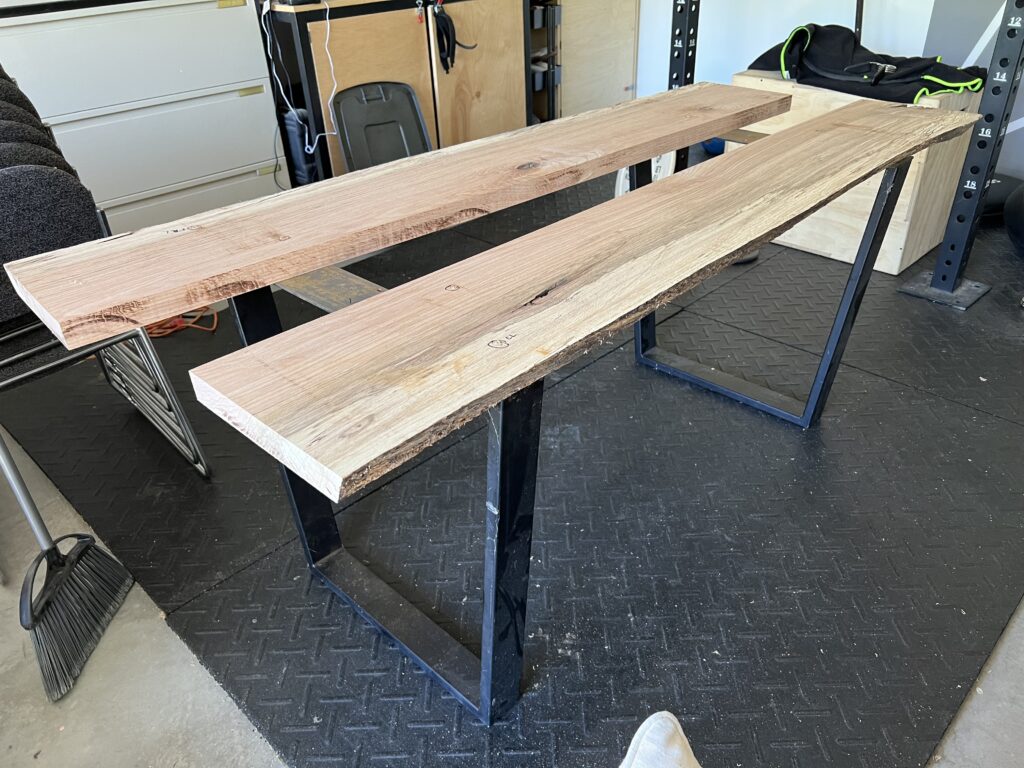
Step 2: Pick out a set of metal heavy duty table legs. Make sure to check the weight the legs will support because the wood slabs and glass will be heavy and need good support. Here are the legs we used for our two tables!
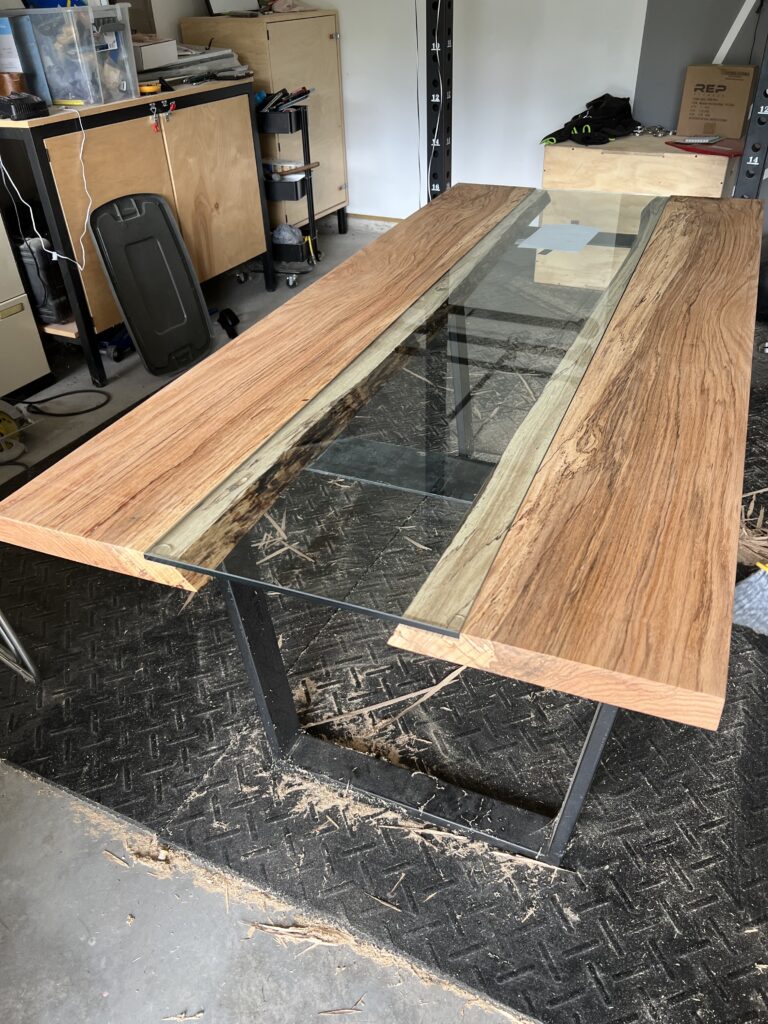
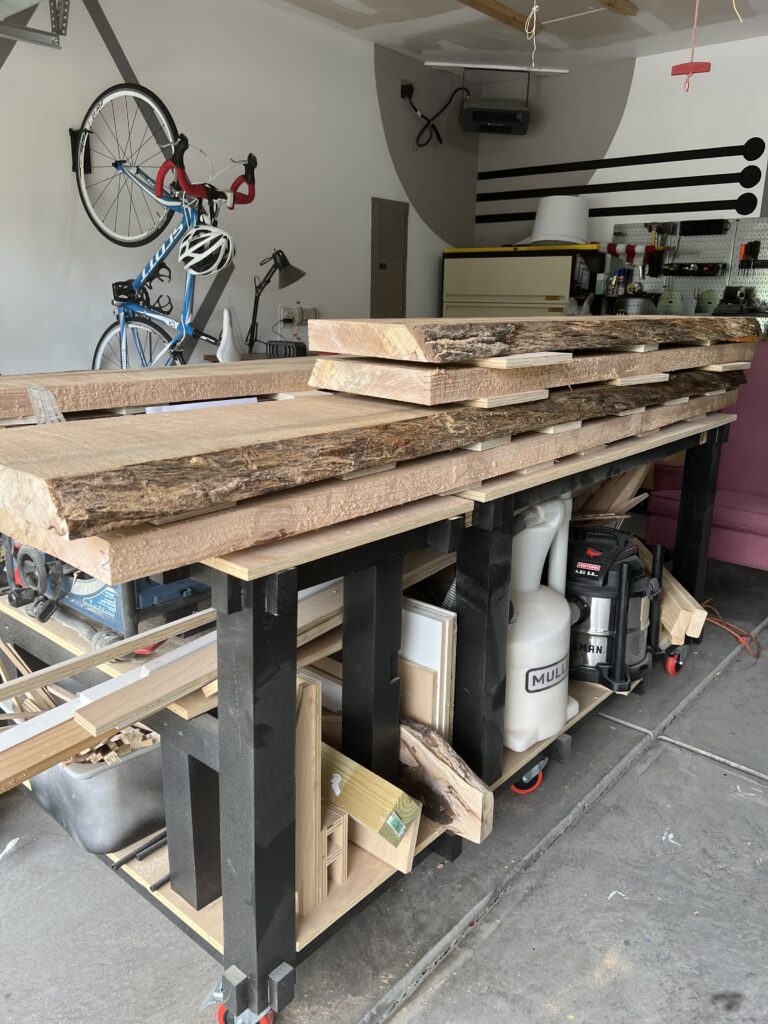
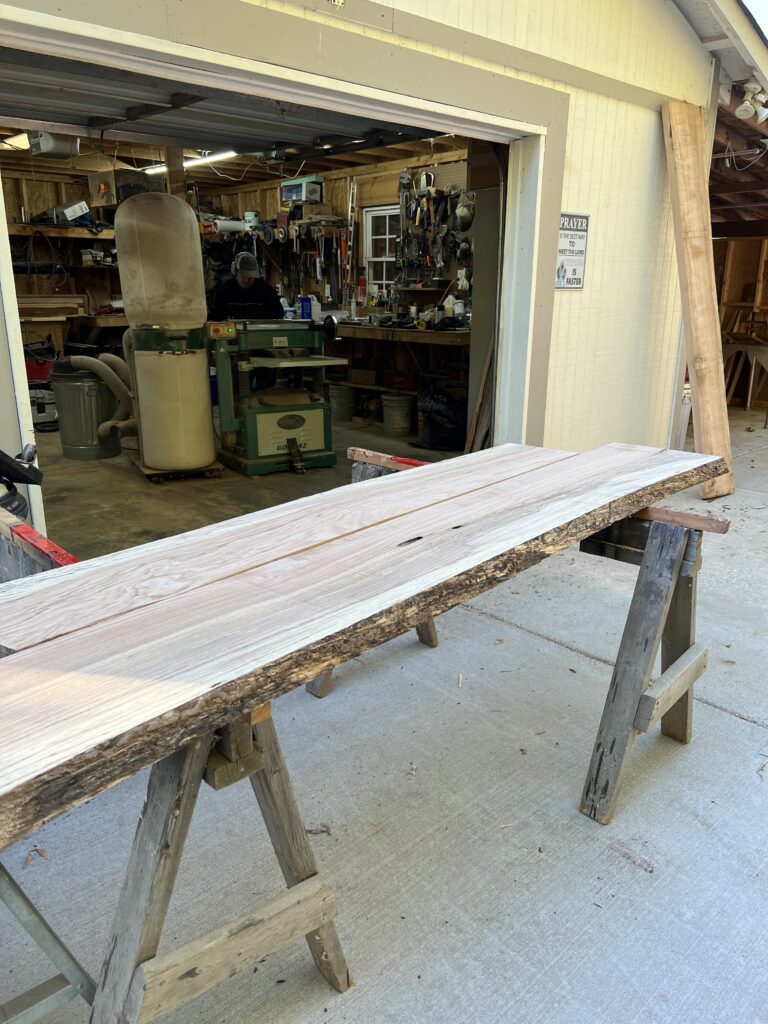
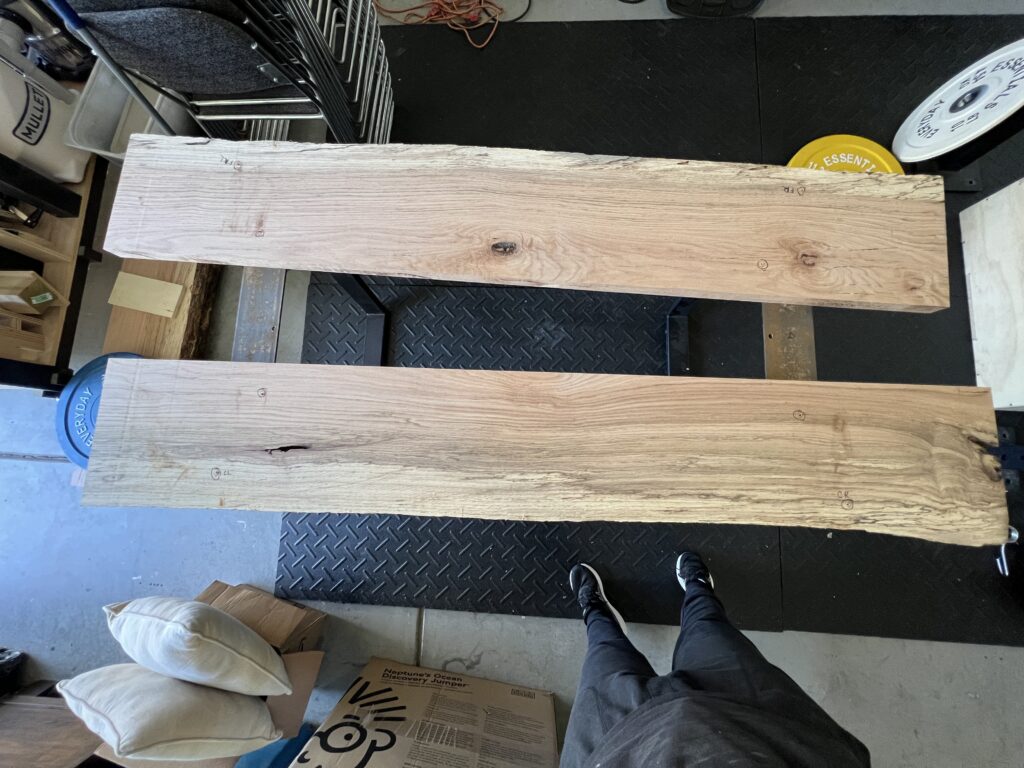
Step 3: Go find your live edge slabs. If you choose one large slab that is around 30” wide you can cut a straight edge down the middle to make your two separate slabs. This will be your major cut already done for your table.
If you choose to separate slabs that are more narrow, that is a good option also. You will need to decide if you want the outside edge of your table to have straight edges or curved edges. Both of your slabs will have two curved edges to start. If you like the curves, keep them as they are. If you want straight edges on the outside, this is when you will use your circular saw to cut one curve off of each slab.
Step 4: Get that small batch of epoxy ready.
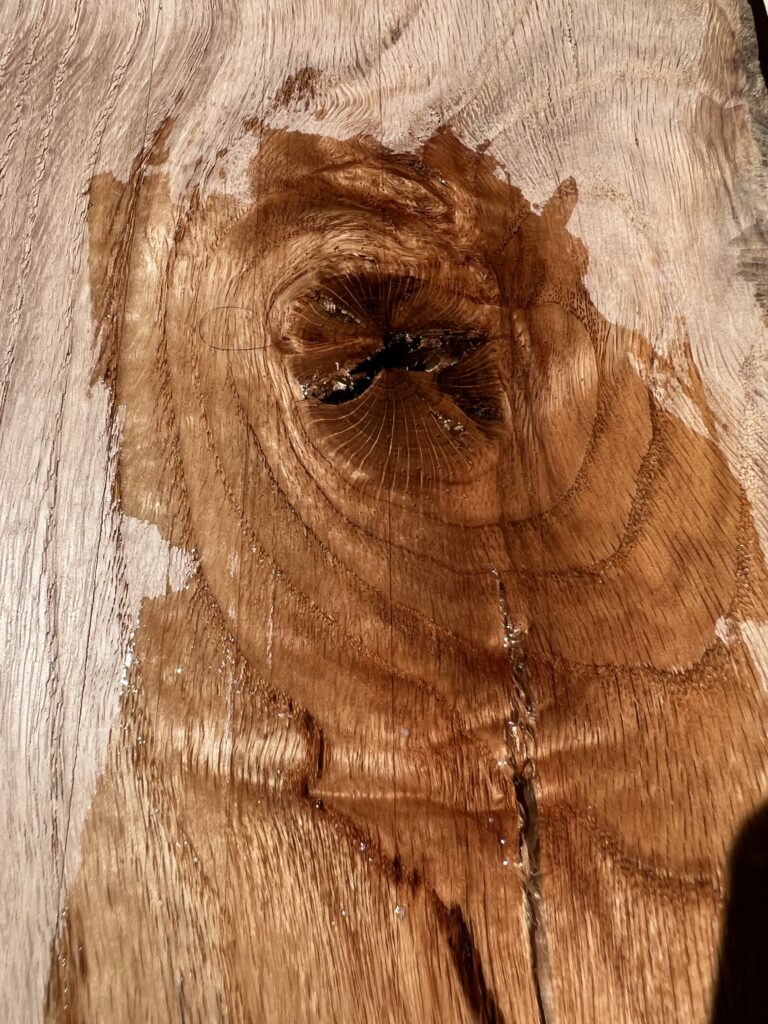
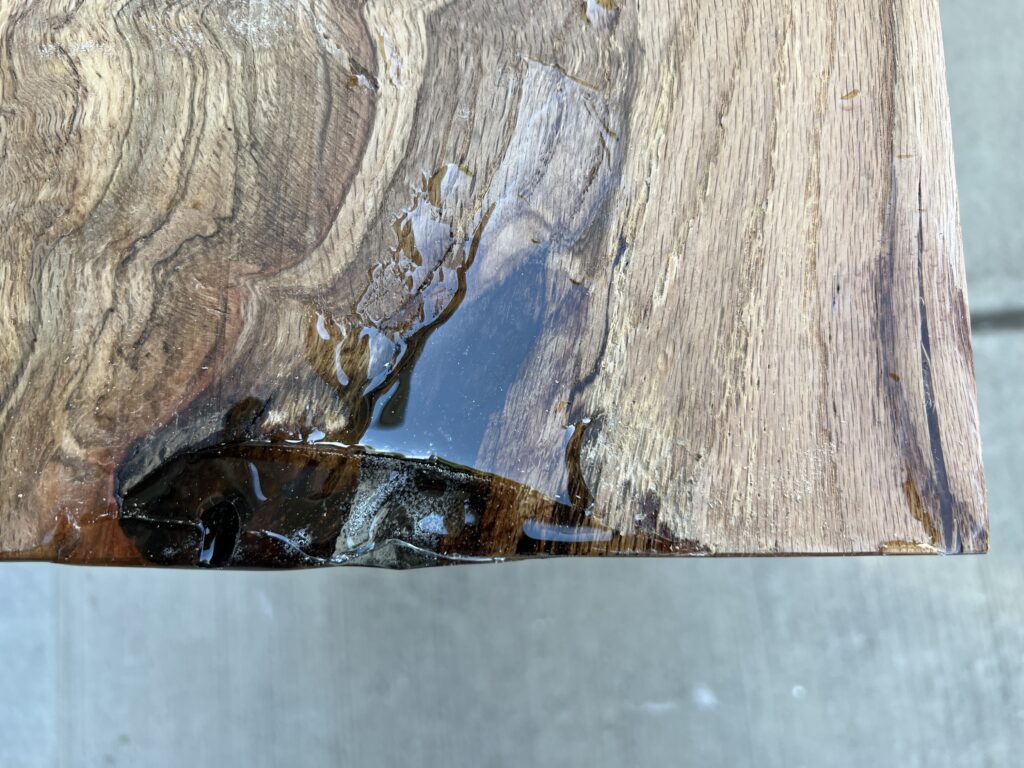
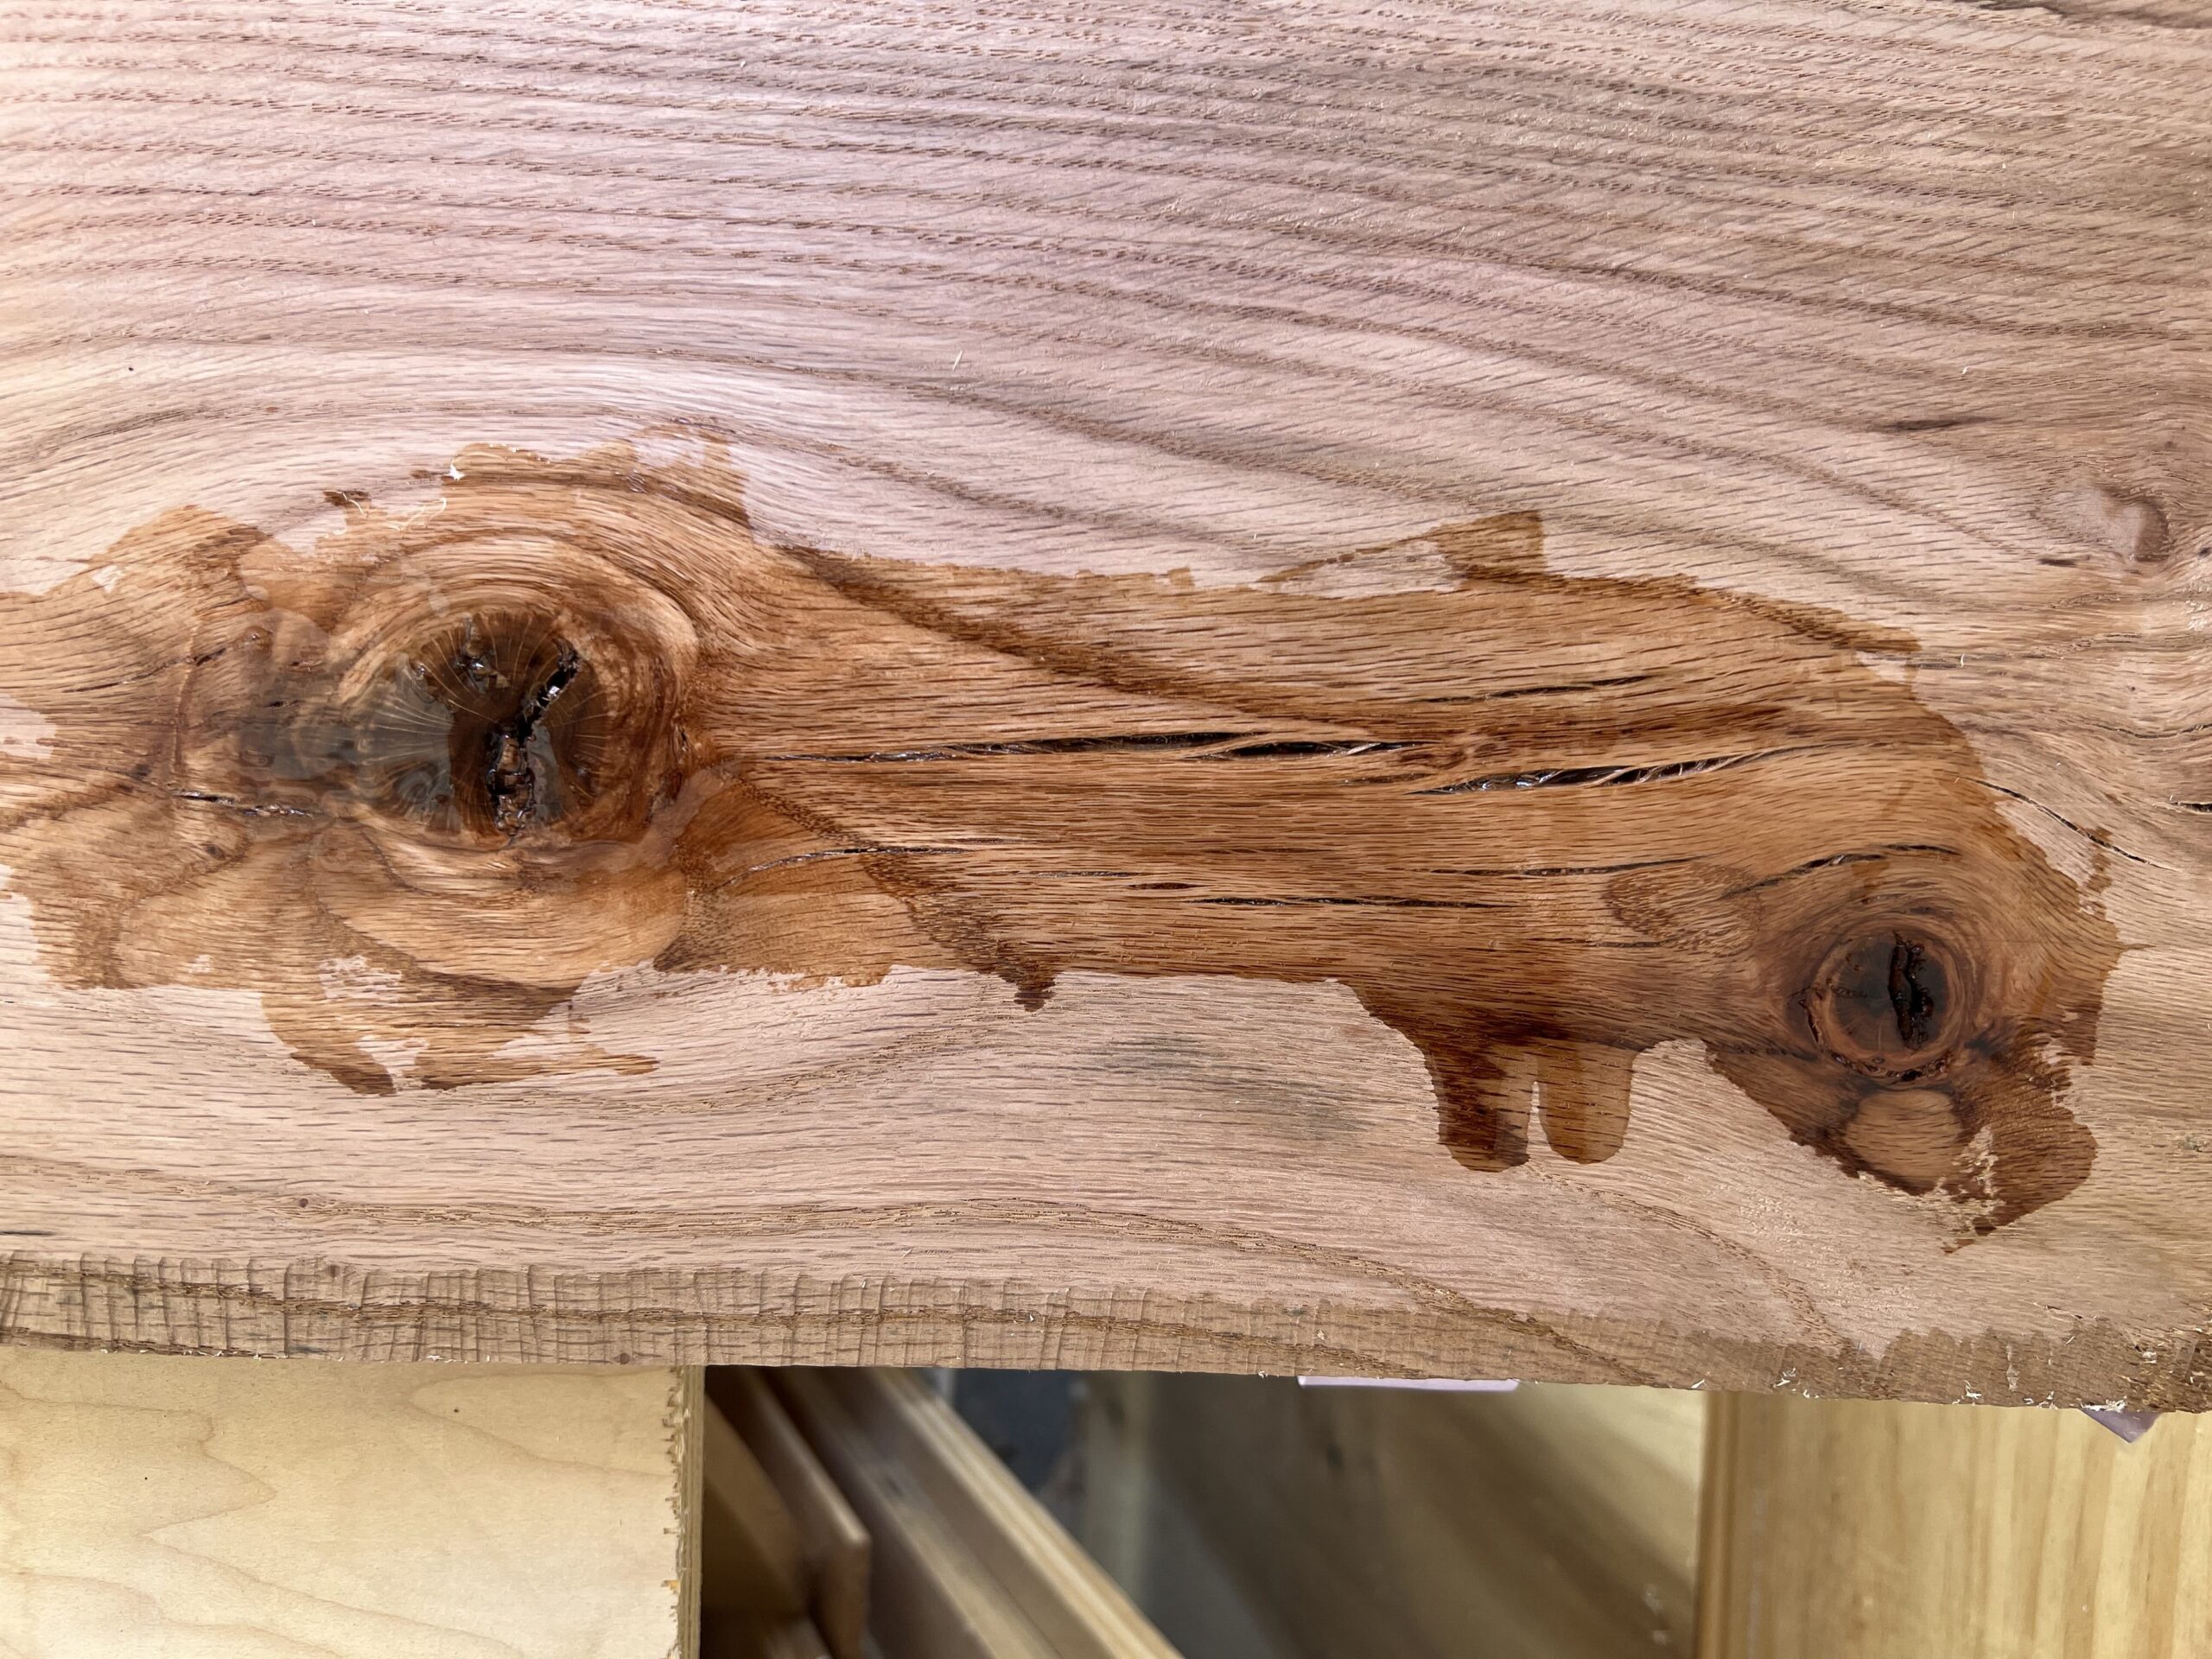
Live edge slabs tend to have a lot of small hole/imperfections, which is normal and why people love them so much, but those holes and imperfections aren’t good for a table top. They can catch a lot of debris and yuck overtime. The holes and imperfections also mean these areas of the wood aren’t stabilized. Wood will move, expand and contract with moisture changes around it, even inside a home.
Putting epoxy in these holes and imperfections will seal and stabilize the wood from moving anymore in these areas. This is a really important step to take your time on and make sure you have filled all of these areas before sealing your table. Use a heat gun to get rid of any air bubbles that may be in the epoxy after pouring.
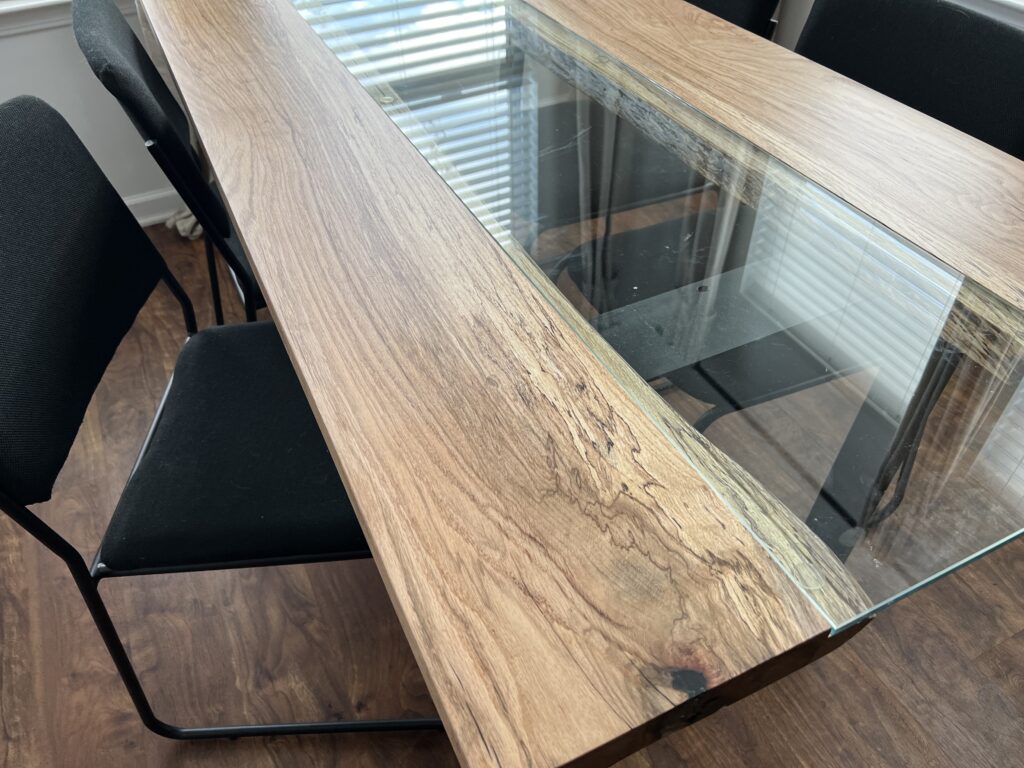
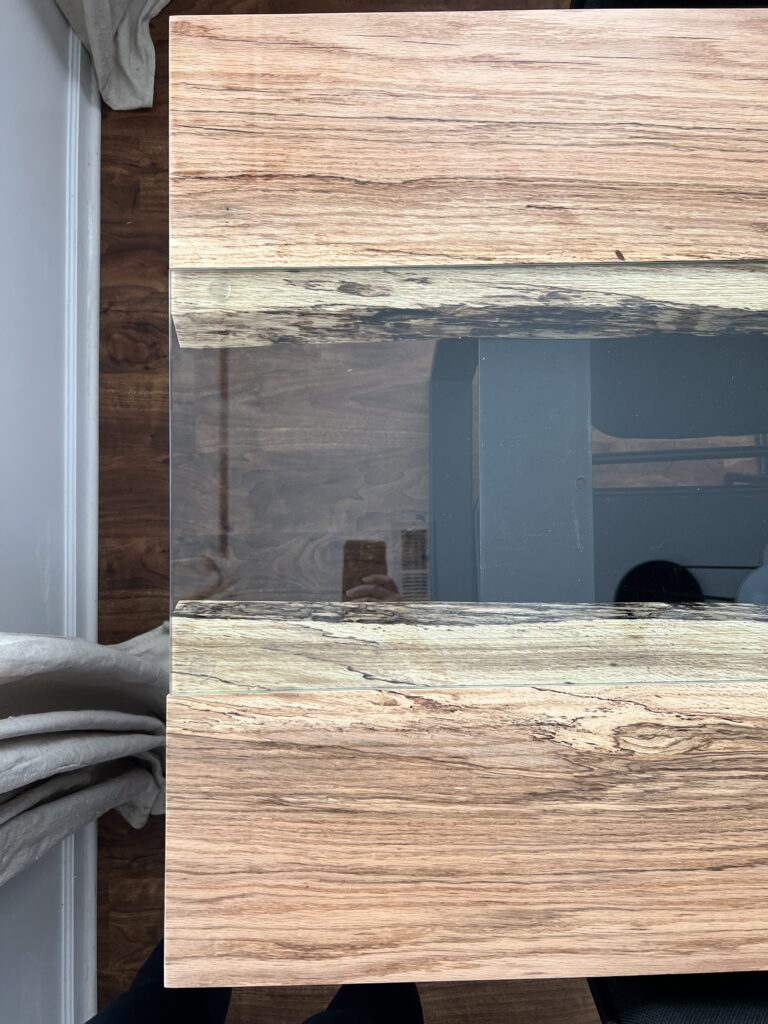
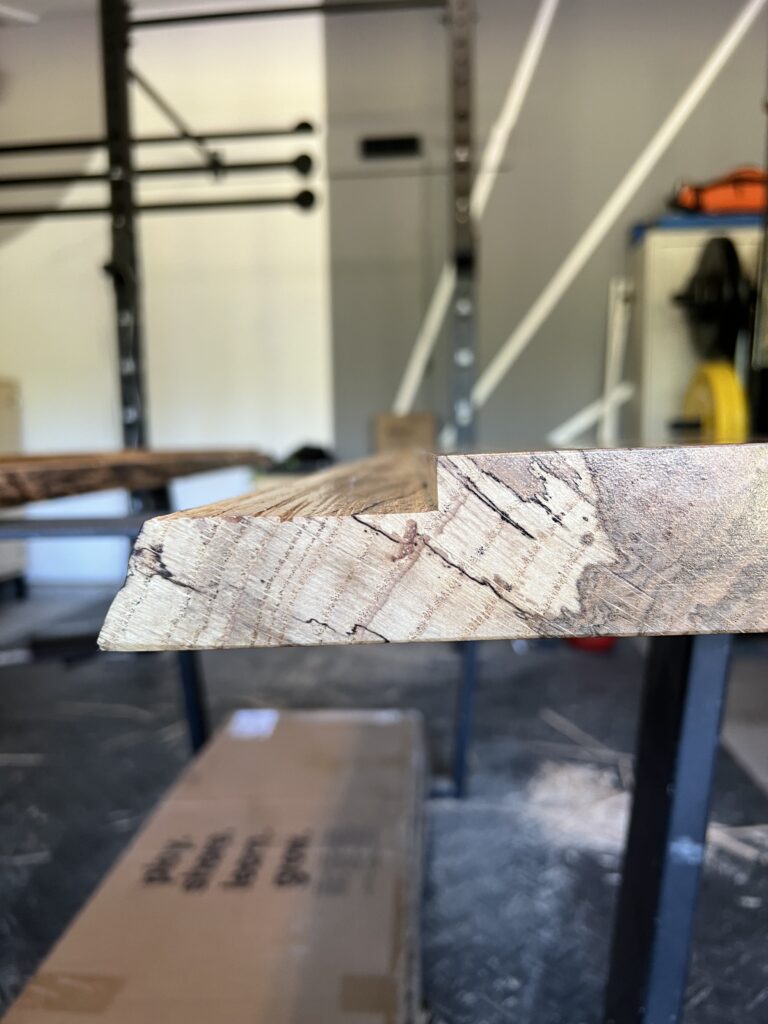
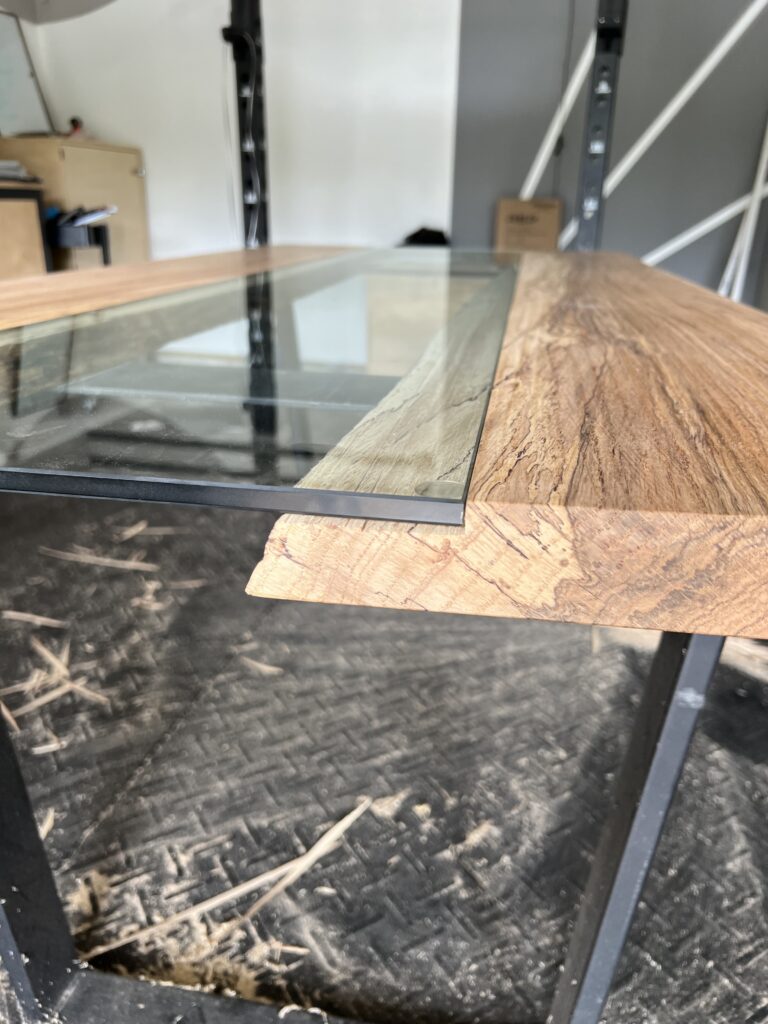
Step 5: You will need to cut a groove in each of your slabs. This is where the glass will sit down flush with the slabs. Using a router to achieve this groove is by far the easiest way to achieve this step.
Mock setup and mount your slabs in place on the table legs you chose. This will give you the exact surface and position your slabs will need sit to for the glass to fit perfectly when in place.
Now you can go ahead and take your exact thickness, width and length measurements to order your glass. This may take a couple weeks depending on the time frame of your glass shop.
Once you get your glass piece in your hand, measure the actual thickness of it yourself with your rubber spears to figure out the depth to cut your groove. Place your glass piece in the middle of your slabs where you want it and draw a line down each edge of your glass. You will use these lines and your depth thickness to cut your grooves. Take your time and don’t rush this part.
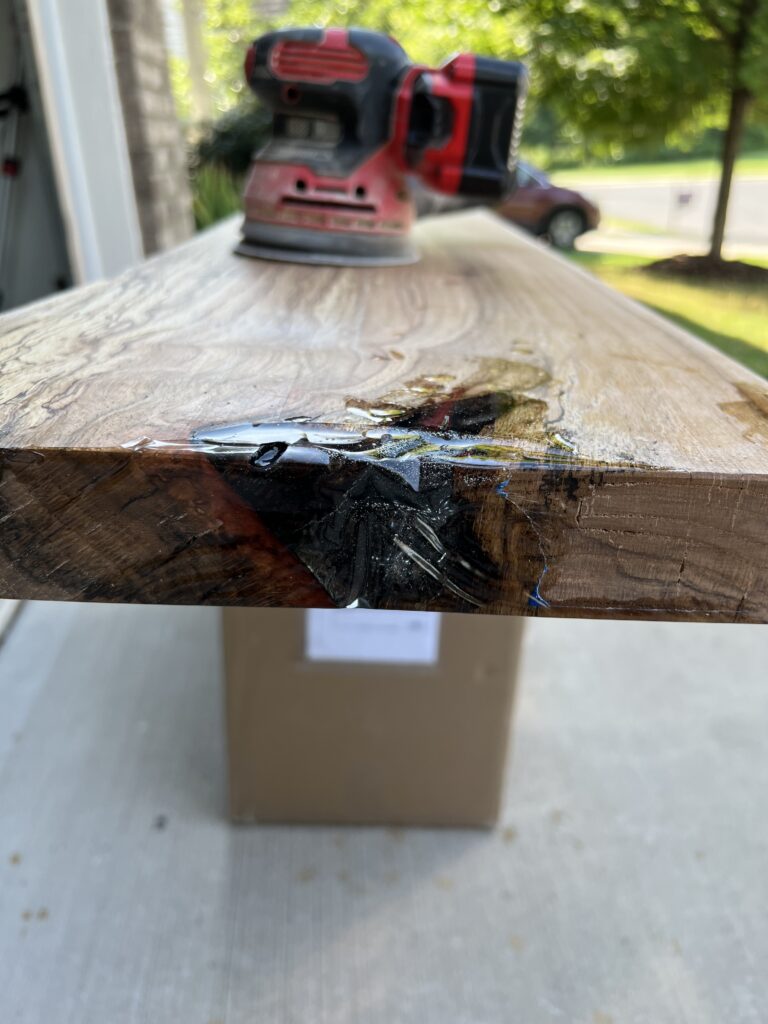
Step 6: You are now ready to sand and start the finishing process. Sand all edges, top and bottom of the table. When you are sanding the live edges you want to knock off any loose bark.
The sanding of your live edges is really to your preference. You can leave more of the natural look or sand the edges down to clean wood.
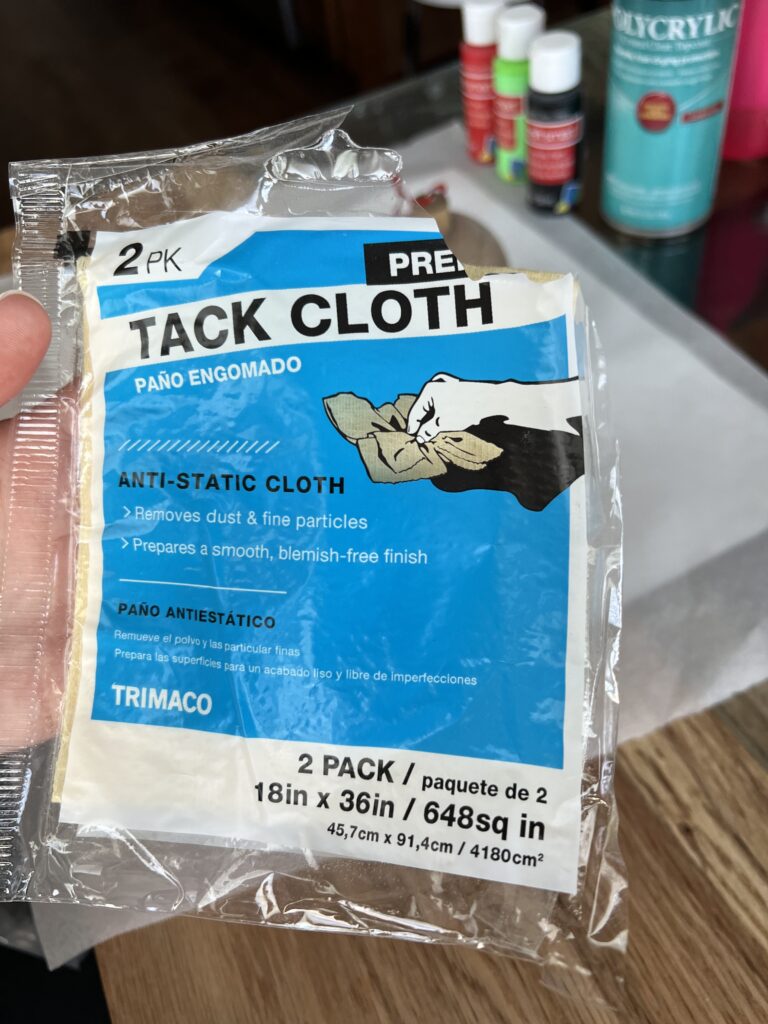
Step 7: Tack cloth all the dust off of your slabs. It’s time to seal your slabs with a clear coat of poly. I recommend sealing the bottom of your slabs first. I did 3 coats for the bottom of the slabs.
They won’t be getting a ton of traffic, but you do want the wood sealed good to help stabilize it from moisture content and temperature changes. Sand between coats with 220 or higher grit sand paper.

Next, flip over and start sealing the edges and top. I did 5 coats for the top and edges. These areas will be subject to a lot more wear and tear over the years. Make sure to sand with 220 grit sandpaper or higher between coats.
For the final coat I look to get a spray can aerosol version of my sealer. This will make sure your last coat is flawless and finish smooth since you won’t be sanding that last coat.
Step 8: Attach your metal legs and finish the DIY live edge table slabs in the room it will be living in. Next add your glass piece and rubber spacers!
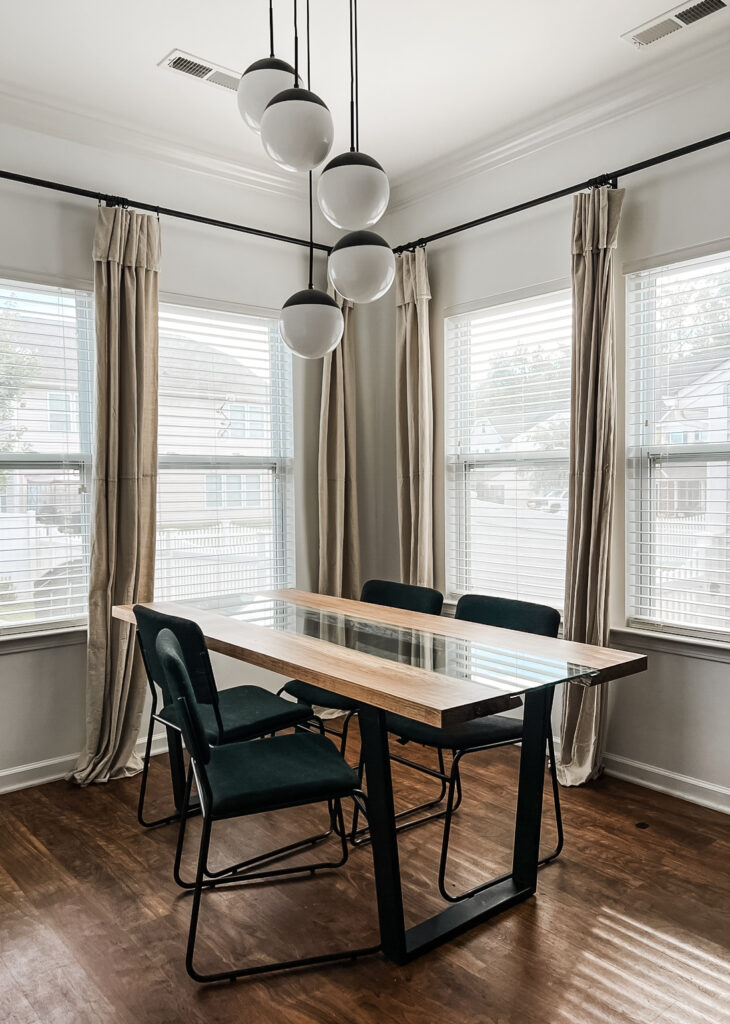
You just completed your DIY Live Edge Table, Congrats!
It’s time to sit down and enjoy your new beautiful table! Not only will it look amazing but knowing you made it will make this piece in your home so special to use for many years to come!
Can you imagine it? You invite family and friends over and all they do is just compliment your handmade table year after year! Yes, you can absolutely build a table like this.
This is why I decided to build ours this exact way. I wanted something that was very much so achievable and doable. Epoxy just seemed a bit out of my skill set on this scale.
We are really happy we went this route instead of epoxy! I could control every step of this process very easily. It didn’t feel overwhelming wondering if I was going to mess up the epoxy. I felt more and more empowered as I progressed to the next step.
With these straightforward steps, you can craft a stunning DIY Live Edge that’s sure to impress. Don’t stop at only your Dining Table this tutorial can be easily tailored to make a DIY Live-Edge Tables like a Live Edge Coffee Table as well. Or you can make a matching DIY Live Edge Bench with our step-by-step tutorial.
Enjoy the satisfaction of creating a unique piece of furniture for your home, free from the complexities of working with epoxy. Start your DIY project today and elevate your living space with this beautiful addition.
If or when you do this DIY Live Edge Table Full Tutorial, I’d love for you to tag us on Instagram so I can see what you create!
COZY HOME, COZY RECIPES:
Every cozy home deserves amazing recipes, and it’s even better when those recipes are both delicious and healthy. Our goal is to provide tasty meals that are easy to make, regardless of your skill level.
Fast, easy meals leave more time for fun activities, making your home a hub of joy and good food.
CONNECT WITH US:
As always, we love hearing about your experiences with our “DIY Live Edge Table: Easy Step-by-Step Tutorial”. Reach out to us through our social channels. Any questions you have, we’re here to answer.
Stay updated by joining our newsletter, offering a monthly dose of new recipes and a first look at upcoming projects.
MORE COZY KITCHEN RECIPES:
If you’re hungry for more, explore our collection of Cozy Kitchen Recipes. Another healthy favorite is the “Sausage Potato Veggie Bake.” Find these recipes and more here.
DIY RESOURCES:
For additional resources, check out our DIY Tutorials, offering a wealth of information to enhance your home improvement skills.

