


Have you ever found yourself in need of a fire starter but didn’t have one readily available? Fear not! In this DIY fire starters guide for your home through the holidays, we’ll show you a simple and creative way to make your own fire starters using common household items. Plus, we’ll add a festive touch, making them perfect handmade party favors for the holidays. These seriously make the cutest party favors or hostess gifts!
Making your own fire starters is not only practical but also a fun DIY project. Here’s a step-by-step guide to help you create these handy tools, with an optional twist for a delightful fragrance. You can get as fancy or keep it as simple as you want. If you are just making these for your everyday life, keeping it simple might be the way to go. Maybe you are making these as a party favor for a get together you are hosting at your home…you might want to consider dressing them up a bit and make them look cute!
Supplies Needed For Your DIY Fire Starters:
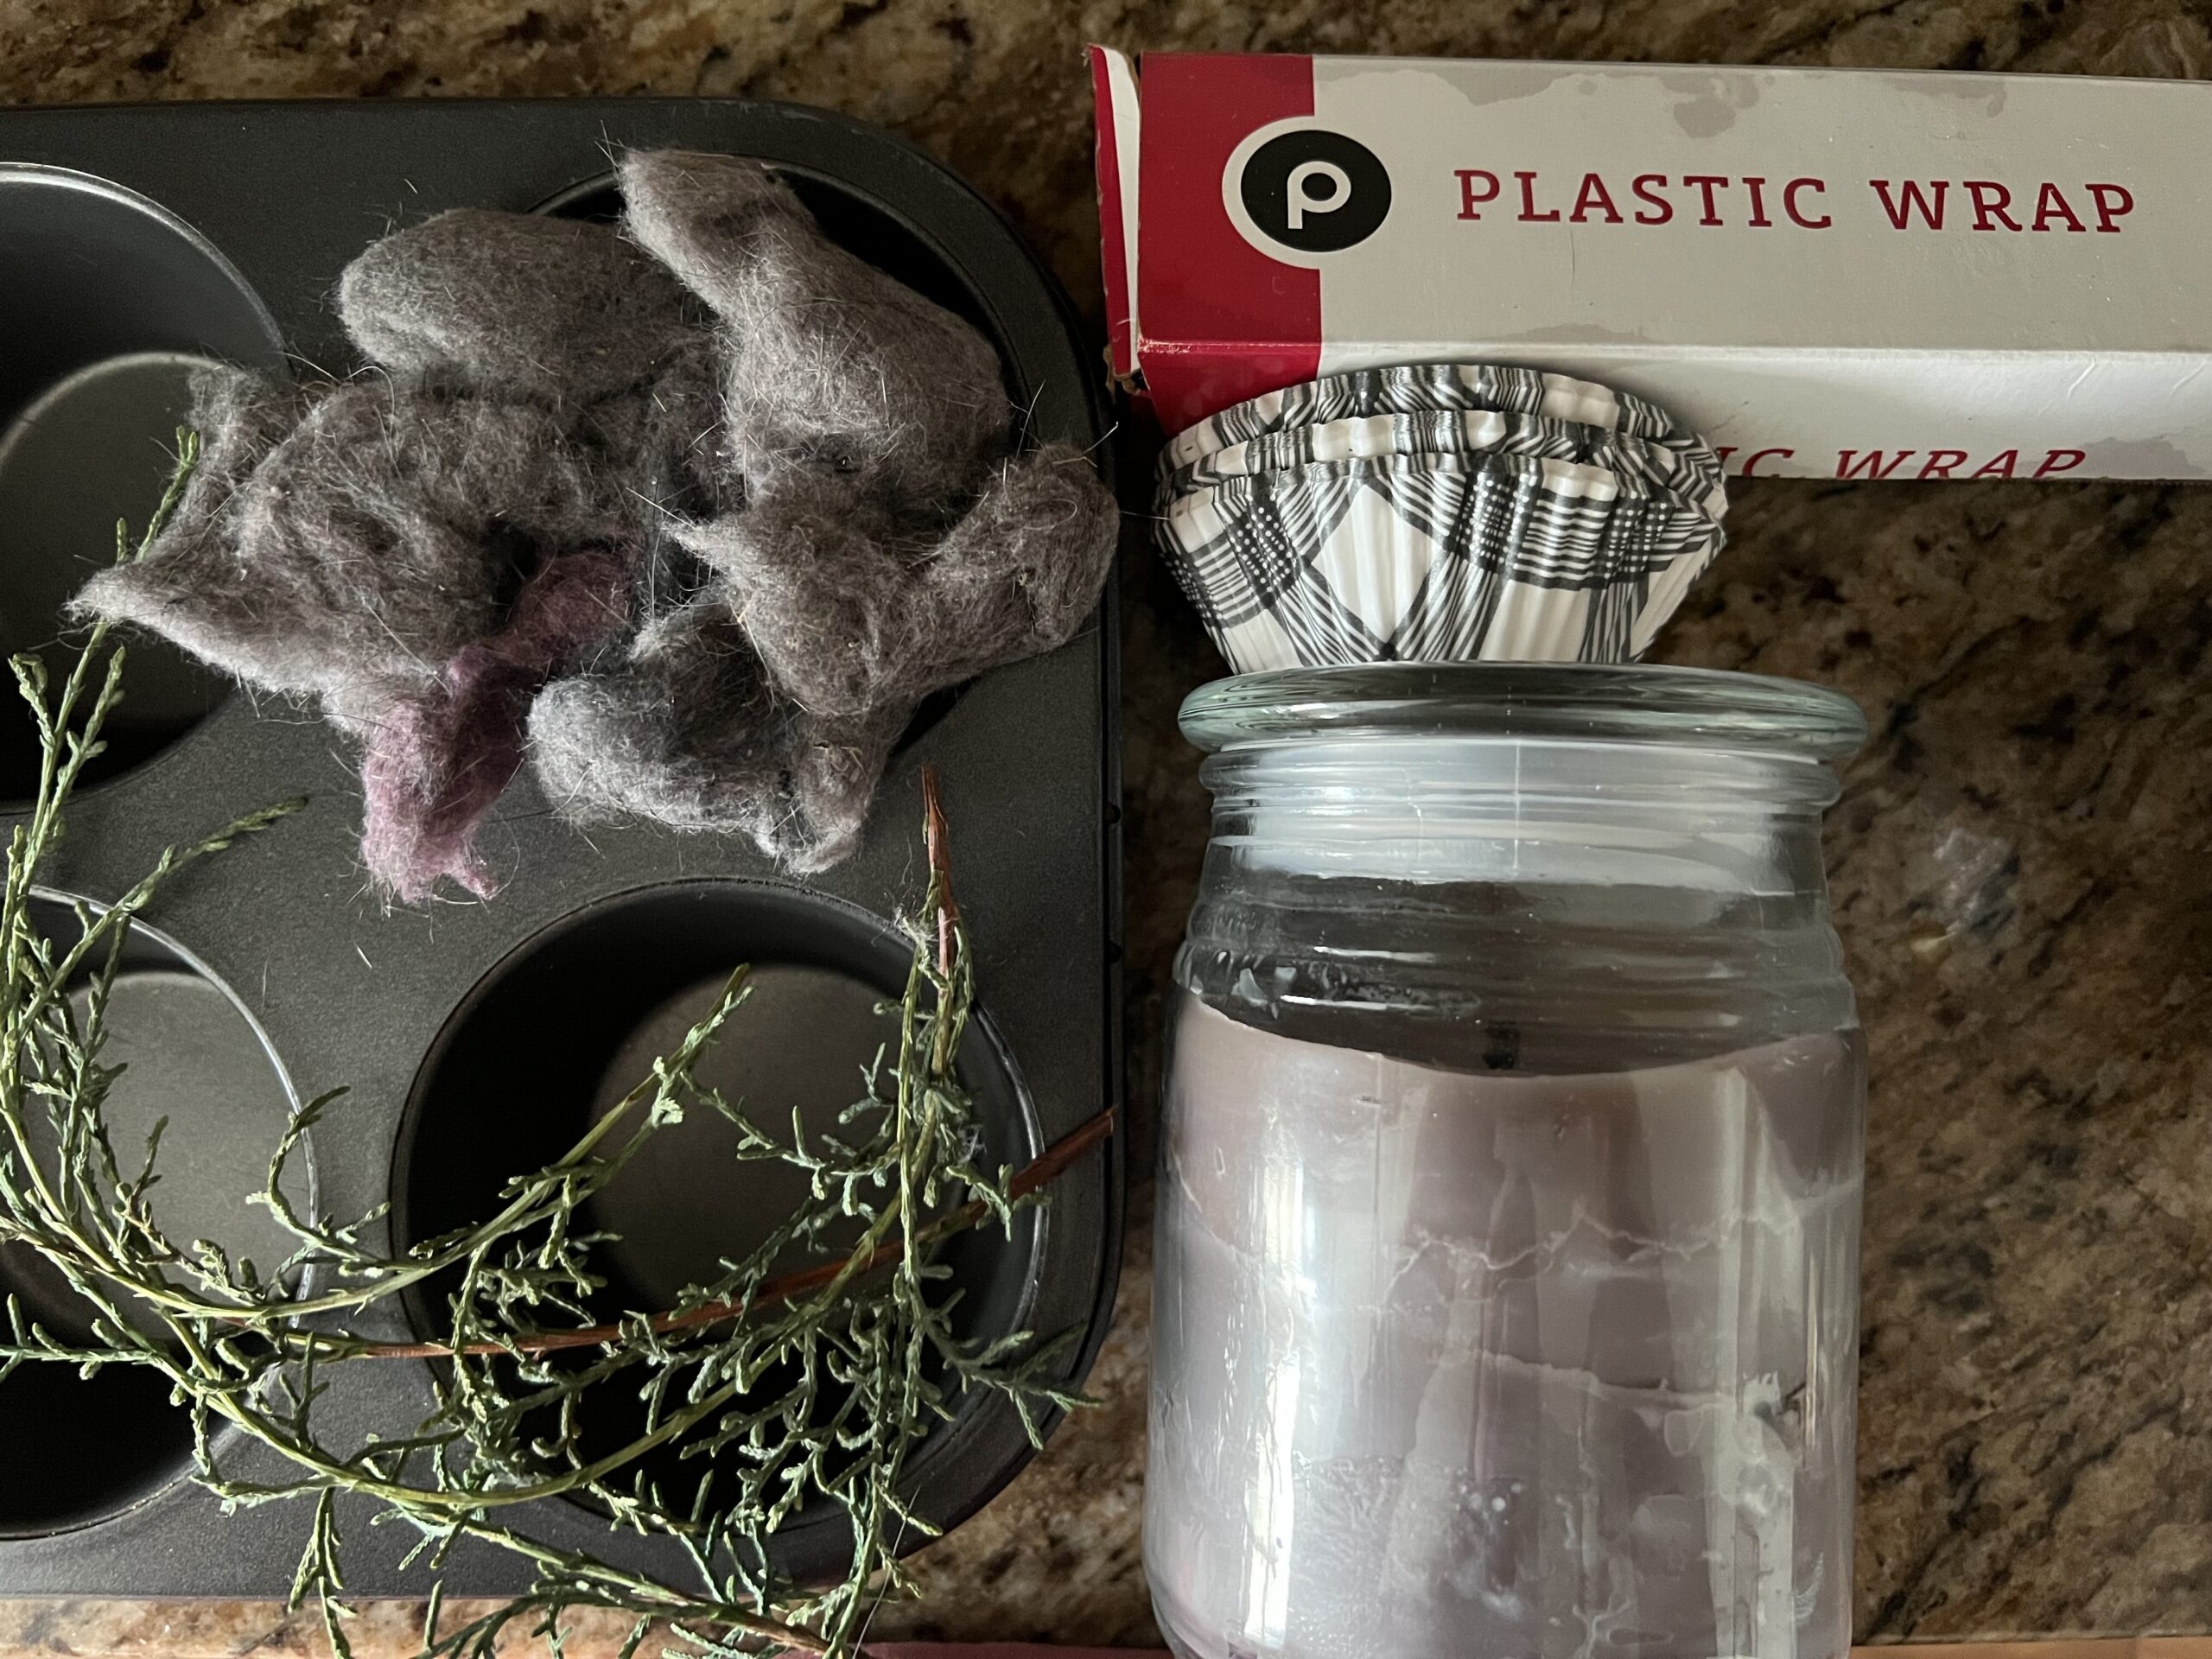
- Paper cupcake liners
- Dryer lint
- Old candle
- Plastic wrap
- Optional: Tree trimmings, cinnamon sticks, dried oranges/cranberries, star anise, and small pine cones

How To Make A Fire Starter:
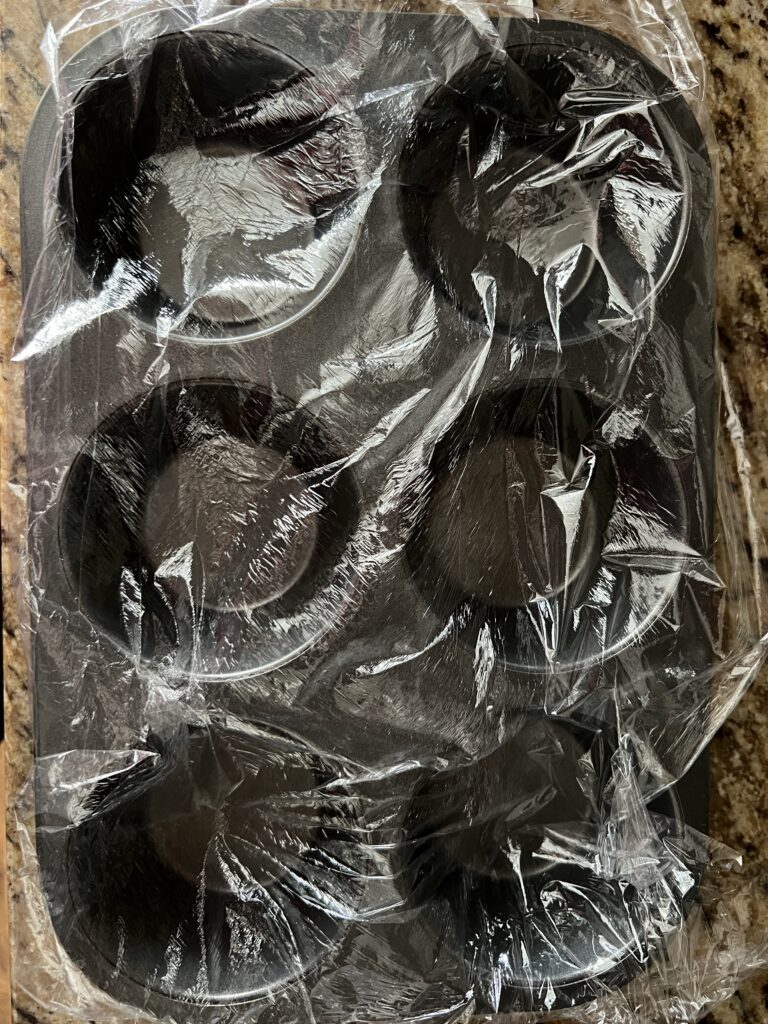
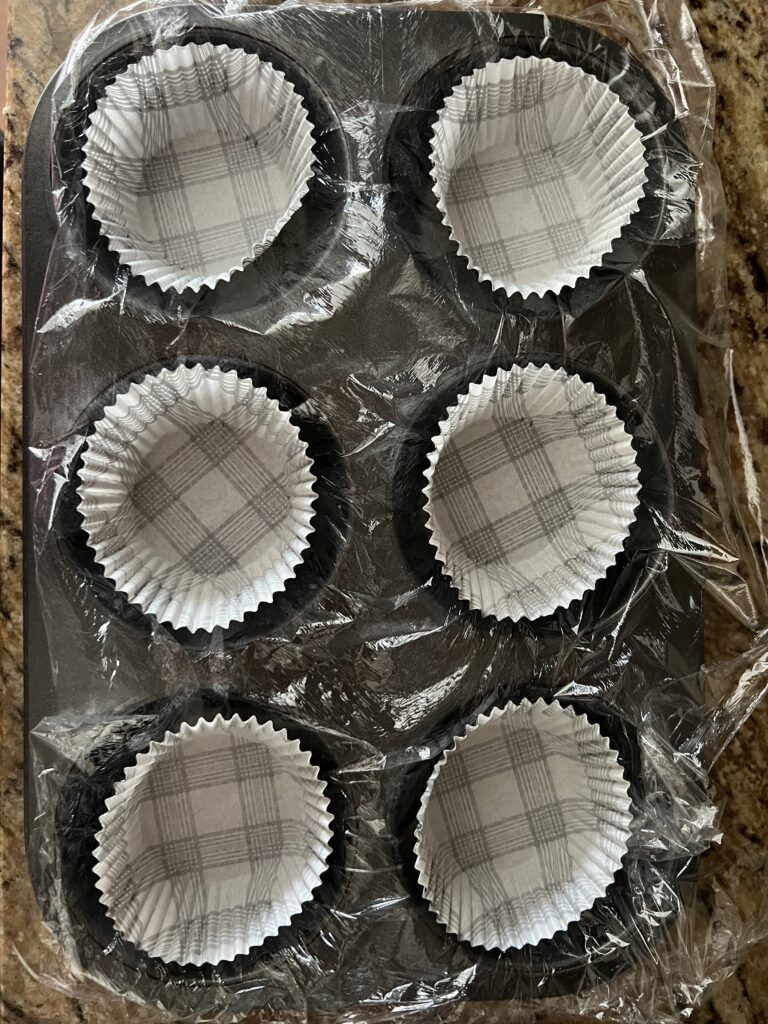
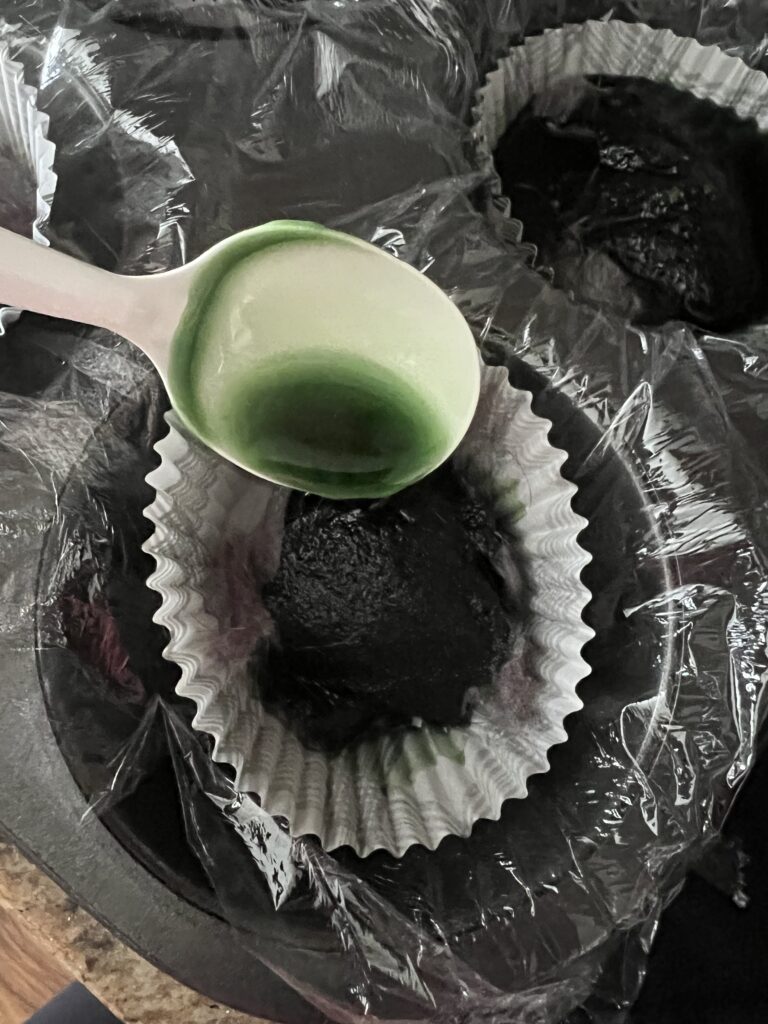
- Prepare the Cupcake Tray: Line the entire cupcake tray with plastic wrap and then place a paper cupcake liner in each cupcake spot.
- Lint Scraps: Tightly ball up your lint into a ball and place one in each liner.
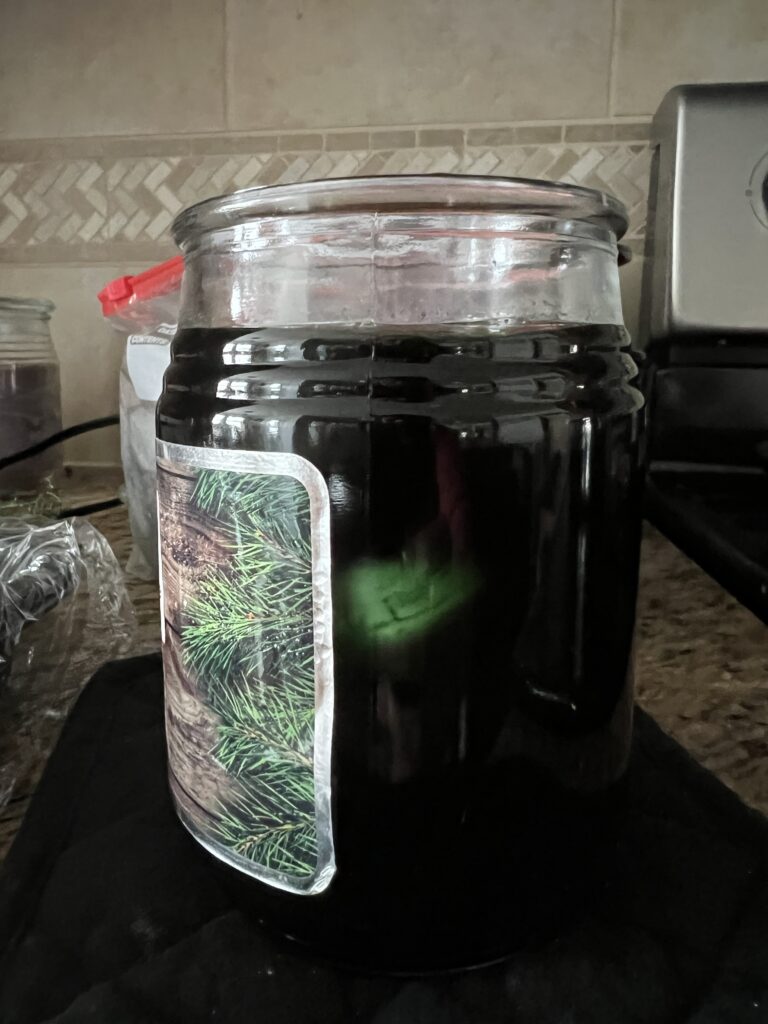
- Melt the Candle Wax: Boil a pot of water and then remove it from the burner carefully. Place your chosen candle in the hot water and let it sit until melted. This will serve as the wax for your fire starters.
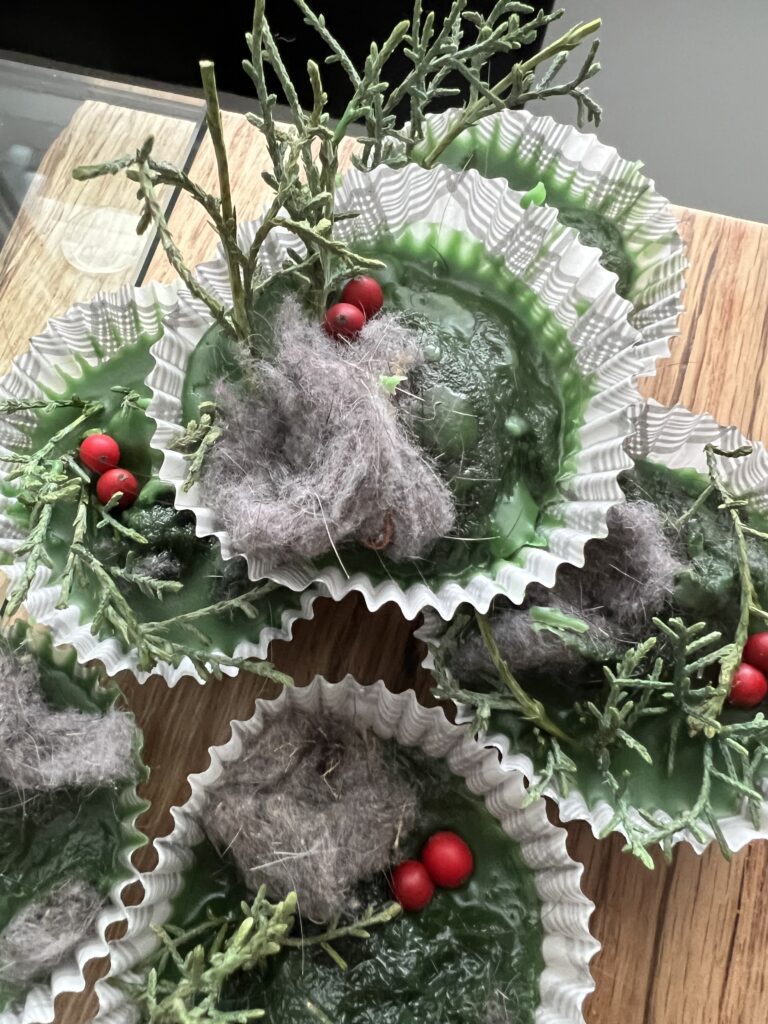
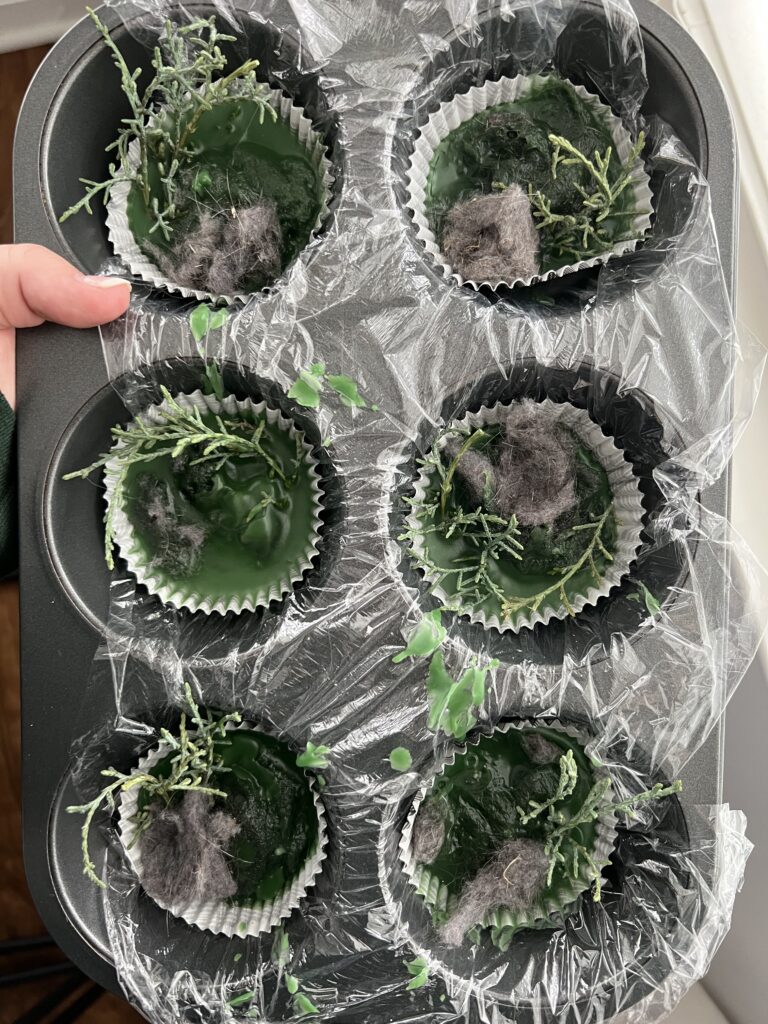
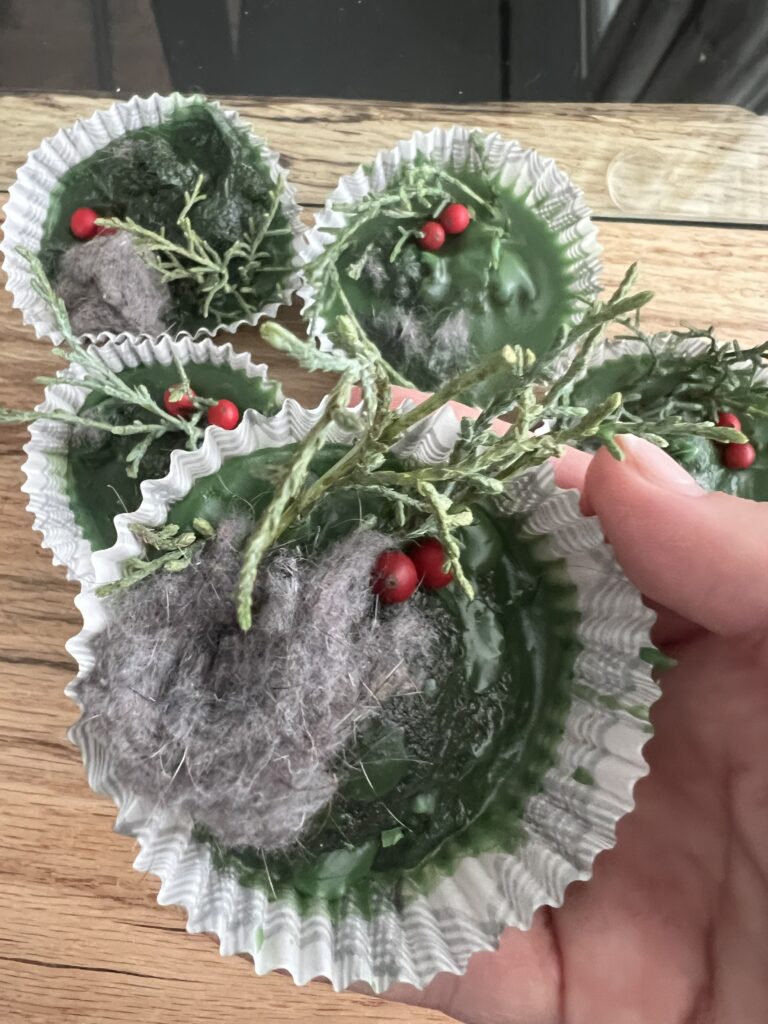
- Prepare the Fillings: Divide the dryer lint and pack it tightly into the cupcake liners. If you’re feeling festive, add optional extras like tree trimmings, cinnamon sticks, dried oranges/cranberries, star anise, or small pine cones.
- Pour the Wax: Slowly pour the melted wax over the contents in the cupcake liners. Ensure a 1/4″ of the liner remains at the top to prevent overflow.
- Cool and Solidify: Allow the fire starters to cool and dry for a minimum of one hour, or until the wax is completely solid.
- Packaging: If you’re gifting the fire starters, place them in little clear bags. For personal use, store them in a water-tight plastic bag to keep them dry. Store in a cool place to prevent melting.
There you have it, your very own DIY fire starters that not only serve a practical purpose but also make fantastic handmade gifts. Feel free to get creative with the ingredients and share your experience with us! If you’re looking for more DIY gift ideas, check out our other seasonal posts on our blog.
Let Us Know Your Thoughts!
As always, we love hearing from you and your experience with “DIY Fire Starters Guide for Home and Holidays” and how it helped you! If you enjoyed this and are looking for more inspiration check out our other Seasonal Posts! Are you stumped on Christmas shopping and need help finding gifts, check out our Gift Guides. Head over to our social channels anytime where you can find videos of us making all kinds of things for our home!

