


Create a Spooky Halloween Vibe with a DIY Pallet Fence
Halloween is just around the corner, and you’re probably already thinking about how to create spooky Halloween decorations as a budget-friendly yard setup. What if you could add a haunted vibe to your outdoor space with a DIY project that’s both easy and inexpensive?
Imagine having a creepy Halloween spooky fence that not only looks awesome but is also made from upcycled pallets—something you can likely get for free or at a minimal cost. Are you ready to wow your trick-or-treaters and neighbors with some outdoor halloween decor and not spend a fortune?
This DIY Halloween fence is perfect for you! This easy fence is simple enough for beginners and adds that eerie touch you’ve been craving for your Halloween decor. Keep reading to learn how you can easily build your own Halloween pallet fence and turn your yard into a creepy look haunted masterpiece.
Why Use Pallets for Your Halloween Fence?
Before we jump into the step-by-step guide, let’s talk about why pallets make an excellent choice for this project. Have you ever noticed how versatile and accessible an old pallet is?
Many people toss them aside without realizing their potential. For Halloween decor, especially something like a rustic fence, pallets are an ideal choice because they give off that old, weathered look right away—no need to distress or age the wood. Plus, they’re sturdy enough to withstand weather conditions and can be reused year after year.
Step-by-Step Guide to Building Your Pallet Fence
Let’s dive into the details! With just a few tools, some creativity, and a couple of hours, you’ll have a Halloween fence that’s ready to go.

Gathering Materials and Prepping the Pallets
When starting any DIY project, the first step is gathering materials. For this Halloween pallet fence, you won’t need much:
- Wooden pallets (about 3-5, depending on how long you want your fence)
- A saw (circular saw, miter saw or handsaw)
- Nails and Screws
- Nail Gun and Drill
- Black paint or stain for a more haunted look
- Sandpaper or a sander
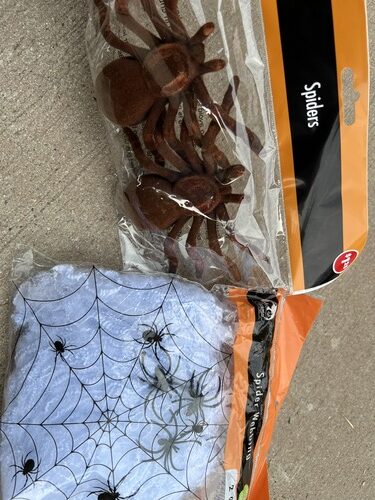
- Decorative Halloween items (optional, like spider webs, skeletons, spiders, etc.)
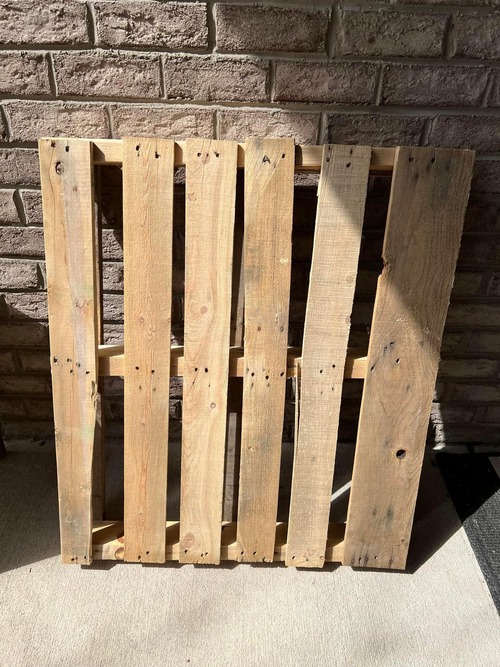
You can often find pallets for free at local businesses or warehouses. Just make sure they’re in decent condition—no broken boards or mold. Once you’ve secured your pallets, it’s time to prep them.
Sand down any rough spots or splinters for a safer build. If you want a more finished look, you can apply black paint or stain to give your fence a spookier, darker tone. This simple step can really transform your pallets into a creepy Halloween scene setter.
Building Your Fence Picket Sections
The next step in this Halloween DIY is building the actual fence. This is easier than it sounds, especially when you’re using pallets. You’re essentially just pulling the pieces apart and putting back together as pickets! Here’s how to do it:
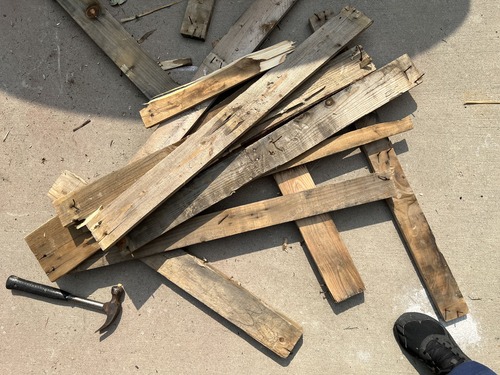
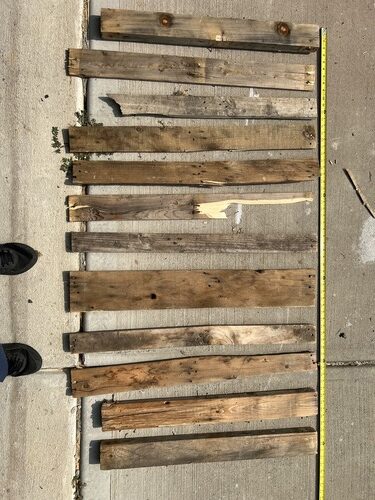
Step 1: Pull apart the Pallets Start by laying your pallets down and prying each piece with a pry bar or hammer. Remove any nails you can as you continue to break down your pallet/pallets.
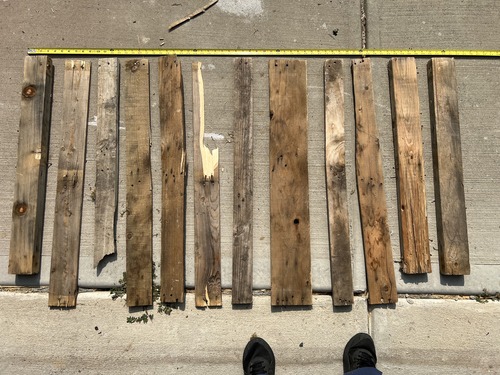
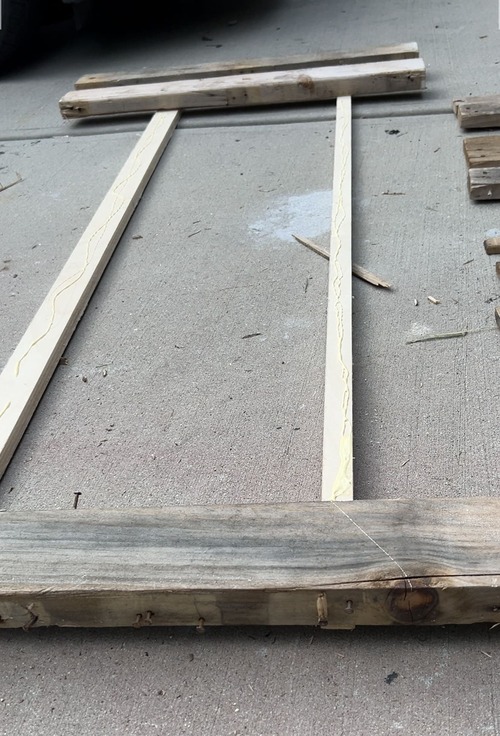
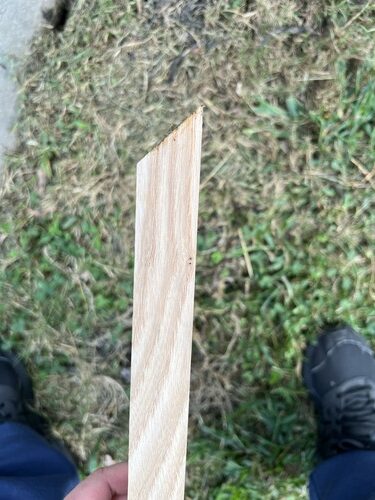
Step 2: Cut to Size If your pallet pieces are too tall, use a saw to cut them down to a more appropriate height for your desired fence pickets height (about 2-4 feet range works best for Halloween decor). Keep 2 longer pieces per section you want to build to be the back supports. Also, if you want your fence picket pieces to have a degree angle at the top, cut those edges now before you put your fence sections together.
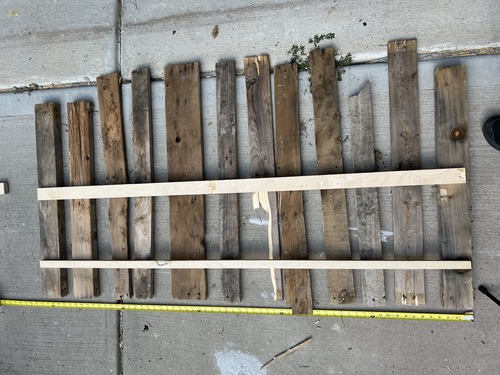
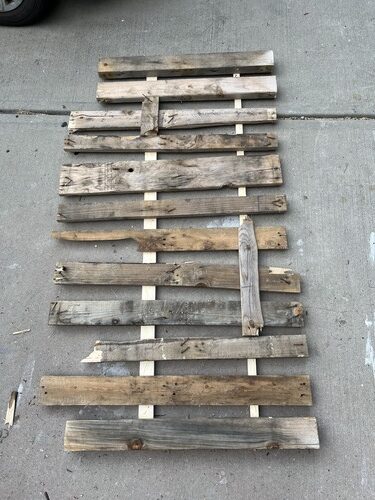
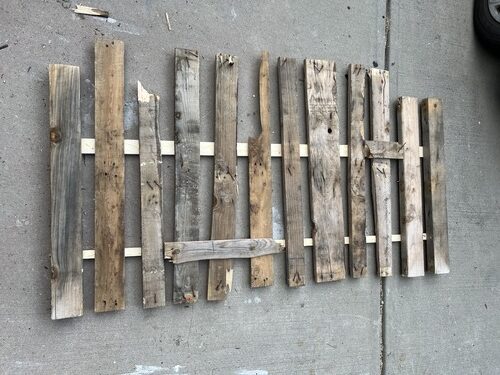
Step 3: Join the Pallets Together Using screws or nails and wood glue, to attach the pallet pieces together as individual fence panels. Lay your short pieces face down staggered in height a little and some crooked. Then lay perpendicular to your short pieces and your two long pieces. One piece close to the top of your pickets and one close to the bottom. Glue and nail/screw each piece into place.

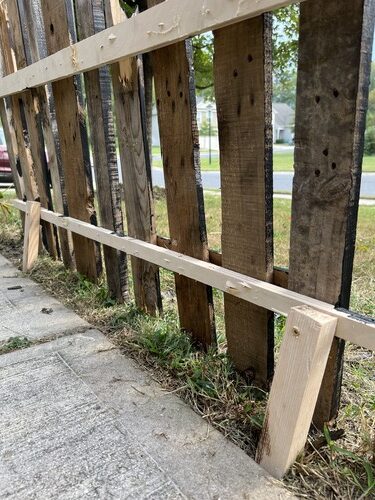
Step 4: Anchor the Fence: Once connected, you’ll need to anchor the fence sections in the ground to keep your fence upright. Drive garden stakes into the ground first and then glue and nai/screwl your fence panels to the stakes. If you don’t want to drive stakes into the ground you can create triangle stands to the back of your fence panels so they just stand up on their own.
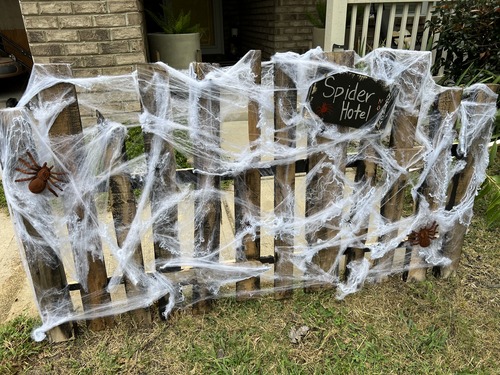
At this point, your fence should be standing, and you’ll start to see the project come to life. If you’re adding any decorative elements like skeleton arms hanging over the top or fake cobwebs, now’s the time to plan where those will go.
Adding the Finishing Touches to your Halloween Fence
Now that your pallet fence is assembled and standing, it’s time to get creative with the finishing touches. This is where you can really lean into the Halloween theme and customize your fence to match your vision. Here are some ideas:
- Sand: Use sand paper or orbital sander to give your fence pickets a more distressed look.
- Paint Details: Use white, glow in the dark or red paint to create the illusion of dripping blood or write creepy messages on the fence.
- Decorative Props: Use a hot glue gun to hang fake spider web, ghostly figures, plastic rats, or skeletons from the fence. You could also drape tattered fabric to make it look more haunted.
- Lighting: Adding some white, orange or purple string lights can enhance the spooky atmosphere, especially at night. Place lanterns or candles in front of the fence to create eerie shadows.
Feel free to add any other Halloween props or personal touches. The great thing about this project is its flexibility. Whether you want something mildly spooky or full-on haunted, you can make this DIY fence your own.
Wrap Up Your DIY Halloween Fence
You’ve now built a creepy, budget-friendly Halloween fence that’s sure to impress anyone who walks by your front yard. By using pallets, you’ve saved money and created something that looks authentically haunted.
With just a little paint, some decorations, and your creativity, you’ve turned simple materials into a Halloween masterpiece. This Halloween Fence DIY: Easy Pallet Tutorial would be a great addition to any DIY halloween graveyard too.
Love Halloween and ready for more DIY Halloween projects? Check out our other spooky tutorials, like our DIY Fabric Ghost Garland or Air Dry Clay Ghosts! And don’t forget to follow us on Instagram for more Halloween video decor ideas and tips!
If or when you get one of these. I’d love for you to tag us on Instagram so I can see what you create!
COZY HOME, COZY RECIPES:
Every cozy home deserves amazing recipes, and it’s even better when those recipes are both delicious and healthy. Our goal is to provide tasty meals that are easy to make, regardless of your skill level.
Fast, easy meals leave more time for fun activities, making your home a hub of joy and good food.
CONNECT WITH US:
As always, we love hearing from you and your experience with “Halloween Fence DIY: Easy Pallet Tutorial” and if it helped you! Reach out to us through our social channels. Any questions you have, we’re here to answer.
Make sure to check out our “Fall Wreaths for Front Door” and “Winter Wreaths for Front Door” and our other Seasonal Blog Posts!!!!
Stay updated by joining our newsletter, offering a monthly dose of new recipes and a first look at upcoming projects.
MORE COZY KITCHEN RECIPES:
If you’re hungry for more, explore our collection of Cozy Kitchen Recipes. Another healthy favorite is the “Sausage Potato Veggie Bake.” Find these recipes and more here.
DIY RESOURCES:
For additional resources, check out our DIY Tutorials, offering a wealth of information to enhance your home improvement skills.

