


Easy One Day DIY Backsplash Install Tutorial
Have you ever wanted to tile a backsplash, but you’re scared of the mess and it takes forever? Well, good news! We have found the best way to install a tile backsplash in one day. We are not only speeding this process up but making it less messy for you to do.
Yes you read that correctly: ONE day and LESS mess! 🙌🏼
We have tiled many things in our DIY journey throughout the years and I’ll be honest – tile was hands down one of our least favorite projects. It’s typically so messy and takes days to complete even the smallest tile projects.
But, not anymore.
At first we were a bit skeptical about this method and wanted to see what the fuss was all about. I promise you, this is legit and it works and looks amazing!
Let’s get into it already!

The old way to install a tile Backsplash…
For as long as people can remember the only way to install a tile backsplash is the way it’s been done for over almost 100 years – with some sort of cement or thinset mixture to attach it to the surface. Then you had to wait a day or two to grout.
Yes, 100 years you heard that right!
I am not even kidding when I say they have been tiling this way since the 1930’s. Backsplashes became popular when running water came into homes. Once the trend started most kitchens had backsplashes within no time.
Fast forward to now and we are still doing it this same way. We are also being told it is the only way still. SO WRONG!
Until now…technology has moved us so fast forward over the years. It has helped us create so many products that are breaking industry glass ceilings. I am so excited for this and to help spread the word.
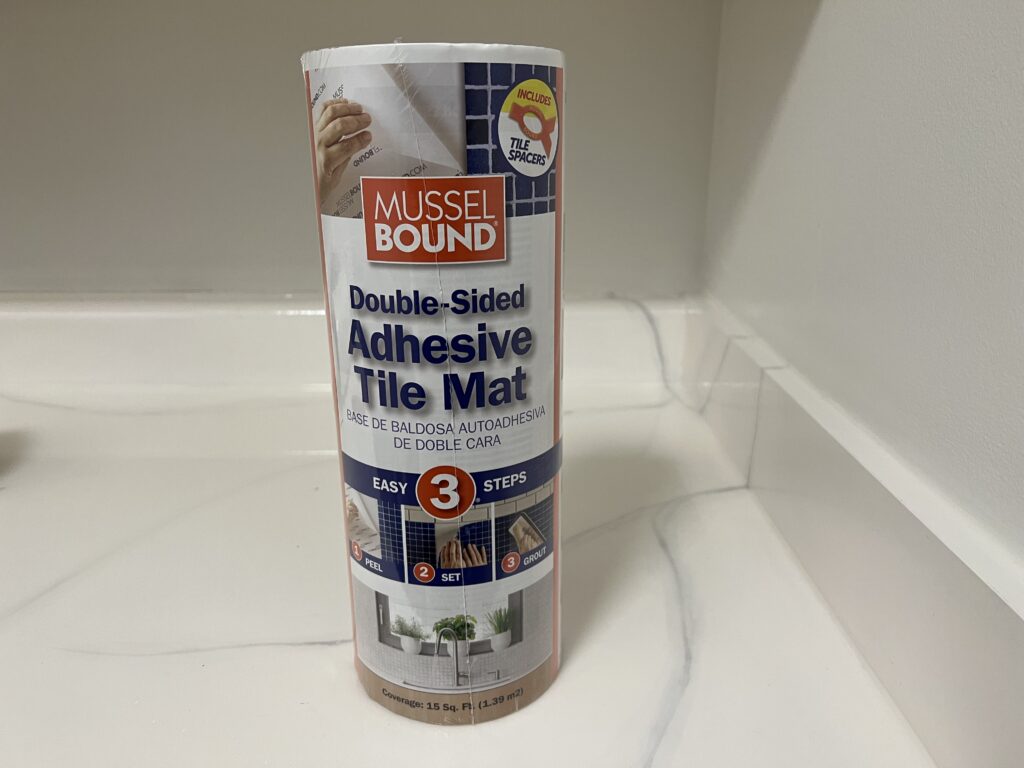
There is a new tile sheriff in town and its name is Musselbound!
Musselbound created an entirely new category when it comes to installing tile backsplashes. It is one of the easiest ways to install and no mess at all when applying it to your adhesive mat surface. It is literally as easy as peeling and sticking a sticker!
Let’s make sure you have the right tools you will need to accomplish your Easy One Day DIY Backsplash Install Tutorial start to finish!
Supply List For Your One Day Backsplash Install
The supply list for this method is so much smaller than the original tile install method. Talk about another win and not needing as many supplies for a project!
PRO TIP: If you are trying to complete this during your weekend off. Pick up all of your supplies Friday night so you are ready to hit the ground running first thing Saturday morning! You have a much better chance of getting it done before work Monday if you give yourself more time than not enough.
Supply List:
- Musselbound
- Utility Knife or Scissors
- Tile Spacers
- Tile
- Grout
- Grout Trowel
- Yellow grout sponge
- Caulking
- Small Bubble Level or Laser Level
- Snap Cutter or Wet Saw
Musselbound is a tile adhesive alternative to traditional thin-set mortar. It can be found on Amazon and at Lowe’s Home Improvement stores. We like to pick ours up at Lowe’s because the price is better there. You will find it in the tile Grout/Thinset area.
Scissors that have a non-stick coating on them are ideal for this project but not 100% necessary to be successful. Just keep in mind you are cutting a giant thick sticker essentially. Your scissors that don’t have a non-stick coating may get gummed up and need cleaning throughout your project. Any Utility knife will also work great for this project if you already have one of those laying around.
How to cut tile with these two options…
- A Snap Cutter is inexpensive and doesn’t require any power. This tool will score and press your straight edge cuts just like cutting glass. The downside to this tool is it is only good for straight cuts no curved cuts. Corners are tedious cuts when using this tool as well.
- A Wet Saw is on the more expensive end and requires power. The upside to this tool is you can cut just about any cut you need for your tile installation or tile patterns needs.
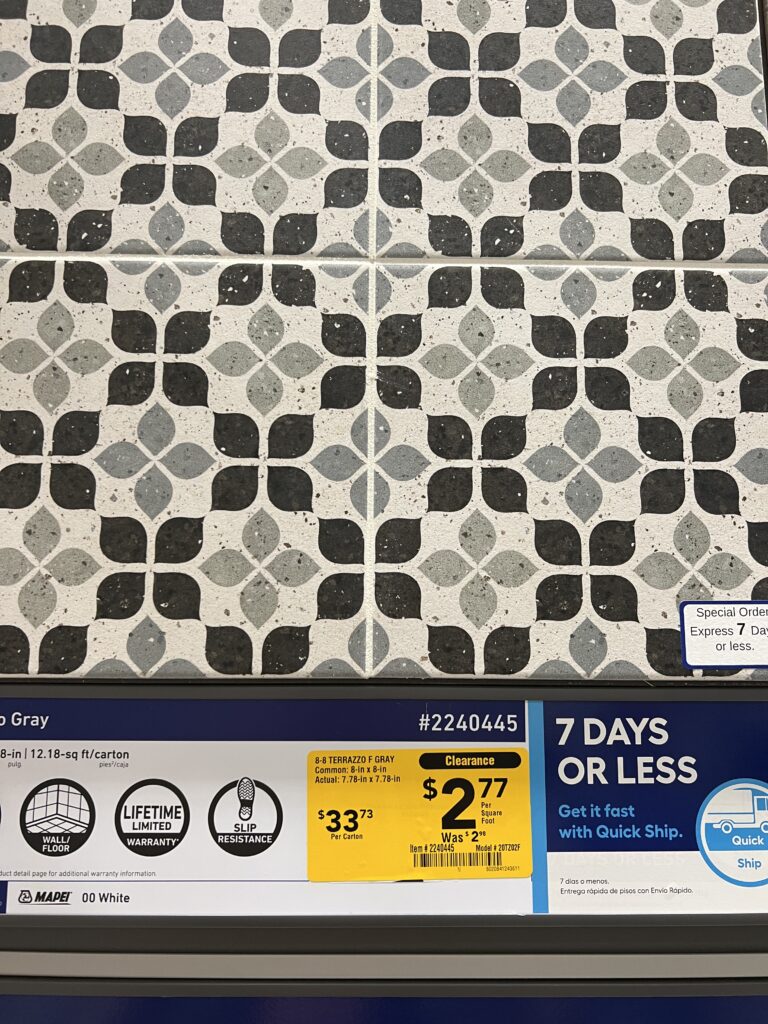
Tile of choice…when it comes to buying tile. Always order 10% more of the square footage you need. This will allow you to have extra in case you make mistakes. Trying to match tile you didn’t buy enough of can be hard if they discontinue it.
Tile Spacers choices will be based on your preference. There are a couple different sizes of tile spacers out there depending on the look and function you are going for. Spacers 2-3mm in size are the most common for wall tile/backsplashes.
How to choose which GROUT to use?
- Sanded grout has fine sand added to the mixture and tends to be cheaper and can be used in most tile applications
- Unsanded grout has no fine sand added to the mixture and tends to be more expensive and only good to use one specific applications
We have used Sanded Grout for all of our tile projects we have done in the past. Sanded is always a good idea to go with in most applications. When in doubt, contact a local tile expert for their opinion.
PRO TIP: The yellow grout sponge you want will be in the Cement/Mortar area of your Home Improvement store. They are a very big and heavy duty sponge that is inexpensive. It is the only sponge that will actually get you through your project to the end. Whatever you do, do not use some cheap household sponge it won’t hold up.
Pre-Mixed Grout is more expensive but makes grouting so much easier. You don’t have to mess with getting the grout the right consistency when mixing. You just scoop it out of the bucket and get to work!
What CAULKING should I use?
This is a loaded question and wow can the Caulk isle be overwhelming. First, if you are using a grout that also has a matching tube version just go with that option so your caulk color matches the grout. Unfortunately those matching tube colors are spendy.
If you are choosing a basic white grout you can save a little money by buying a cheap tube of white caulk vs. the matching tube of grout color caulk. This Caulk will work just as good as the matching tubes but save you probably $10 per tube.
Bubble Level or Laser Level?
- Bubble Levels are inexpensive and most people already have them in their home. Once you get the first tile in and level you should only have to check every now and again to make sure it is still all level as you progress with laying your tile.
- Laser Levels can be spendy and not everyone has one just laying around. They are a great no fuss option though, very much so a set and forget it kinda tool. You just set your level line and leave it. It is easy to follow as you move through your tile install knowing each tile is level following your line.
I am still in shock with how few supplies you can tackle this project with!
Let’s talk about the install process the easy way!

A Step by Step Guide for Installing Your One Day Backsplash
Now that you know how far tile work has come in the last 100 years and the tools you will need to be successful in your project. Let’s dive into how you make it happen in one day!
Step 1: Make sure your backsplash surface is clean of any debris and oil before applying the Musselbound. This can build up overtime from cooking and cause your Musselbound not to stick well.
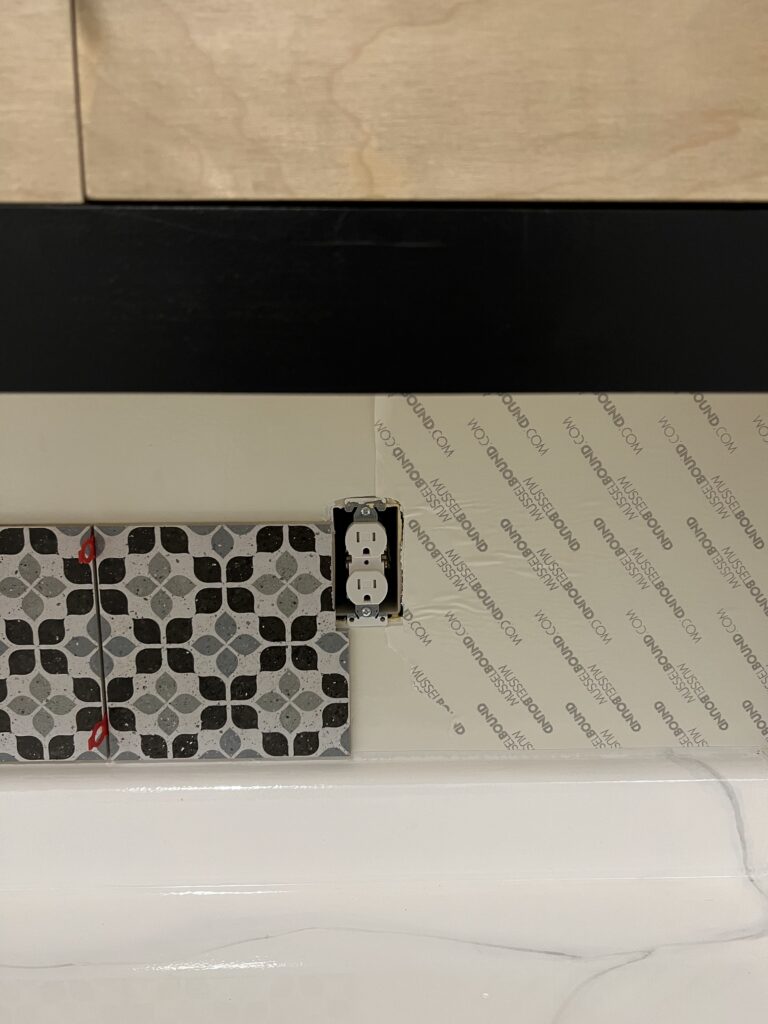
Step 2: Start to unravel the Musselbound working small sections at a time. Leave the paper on the outside of the Musselbound until you start adding the tile. Start by sticking in a corner and slowly press firmly as you stick it down the wall. Use your Grout Trowel to help make sure it is flat with no bubbles or wrinkles as you go. If you need to peel it up in an area it is easier to do it right away vs. waiting.
Step 3: Get your first piece of tile you want to install ready and peel back the top layer of Musselbound paper to reveal the sticky surface at your starting point. Working in small sections a little bit at a time and pulling the paper as you go is the best way to work with an adhesive tile mat.
Step 4: If you are using a Laser Level, set that up before you start to stick tile.
Step 5: Before you stick any tiles make sure they are 100% dry. This is the one big difference between laying tile the traditional way and this way. Your tiles can not be wet at all when you stick them or they will not adhere well.
PRO TIP: Keep a hair dryer close by if you have to cut any individual tiles and you are using a wet tile saw. Before you install the wet tile, use the hair dryer for a few minutes until it is completely dry.
Step 6: Stick your first tile in place making sure it is level and lined up. Getting this first tile right is so important. It lays the foundation for all your others tiles moving forward.
Step 7: Add your spacers in between all sides of your tiles. This will give you consistency and the tiles will continue to line up and have the same size grout lines all throughout.
Step 8: Get your grout ready with a bucket of clean water nearby and your big yellow sponge. Using your Grout Trowel start spreading the grout into the spaces between your tiles. Make sure the gaps are getting filled completely with grout.
Step 9: Working in small sections after applying some grout use your damp sponge to wipe off any excess grout that may be on the face of the tile. Do not let the grout dry on the tile’s surface. It will be very hard to get off once dried.
Step 10: Keep repeating steps 8 & 9 until all grout lines are filled.
Step 11: Go back one or two more times with your sponge and wipe off the tile surface. You want to make sure you get off as much of the grout as possible from the tile surface before it dries.
Step 12: Use your caulk to fill all of your border gaps. This may be between the tile and wall or tile and countertop.
You are done with your Easy One Day DIY Backsplash Install Tutorial! It really is that simple, fast and easy of a process! I really can’t even begin to tell you how excited I am for you to try this Easy One Day DIY Backsplash Install Tutorial!
Do yourself a favor and upgrade that kitchen backsplash tile you’ve been dying to do for a long time now!
You can do it!!!


I really wanted an easy, low mess way of tackling our laundry room backsplash.
The Mussel Bound really did impress us with its ease of use and low mess clean up. It unrolled and stuck to the wall and we were off and ready to start placing tile pieces and finished our backsplash that same day.
I will say though there are some key factors in making sure your install goes as planned and the longevity of the product is maintained. The instructions on the packaging were very easy to follow. Follow those and your projects will go smoothly.
I am still pinching myself at this method and how well it worked!
Now that you just learned how to tackle your tile backsplash project in less than one weekend! Would you try this method yourself?
If or when you do this “Easy One Day DIY Backsplash Install Tutorial”, I’d love for you to tag us on Instagram so I can see what you create!
COZY HOME, COZY RECIPES:
Every cozy home deserves amazing recipes, and it’s even better when those recipes are both delicious and healthy. Our goal is to provide tasty meals that are easy to make, regardless of your skill level.
Fast, easy meals leave more time for fun activities, making your home a hub of joy and good food.
CONNECT WITH US:
As always, we love hearing about your experiences with our “Easy One Day DIY Backsplash Install Tutorial”. Reach out to us through our social channels. Any questions you have, we’re here to answer.
Stay updated by joining our newsletter, offering a monthly dose of new recipes and a first look at upcoming projects.
MORE COZY KITCHEN RECIPES:
If you’re hungry for more, explore our collection of Cozy Kitchen Recipes. Another healthy favorite is the “Sausage Potato Veggie Bake.” Find these recipes and more here.
DIY RESOURCES:
For additional resources, check out our DIY Tutorials, offering a wealth of information to enhance your home improvement skills.

