


Make your own Concrete Fireplace on a budget!
Does your home have a wall or fireplace that just feels blah? I can totally relate! It’s normal to want certain parts of your home to feature a little extra “umph” which is why I was excited to discover a DIY Concrete Fireplace that looks like real concrete!
In this DIY guide, you’ll learn how to discover the magic of a Faux DIY Concrete texture and how to achieve it affordably. In almost no time, you’ll be able to transform your fireplace surround or walls with a customizable finish that exudes charm and elegance.
What is a DIY Concrete Fireplace?
I had no idea what it was until I saw it on another fireplace and fell in love with the texture. Immediately I knew I wanted to use it on the front surround of our fireplace.
I had to do some digging to find out how people achieved the look. I found out that you can buy it pre-made but it is a bit spendy.
So, naturally, I kept digging until I found that I could make it myself with supplies I already had. When you make the DIY concrete mixture yourself, you can also make it any color you want with this DIY version.
I feel like I have mostly seen it used in neutral colors, but you can get as creative as you want with your color choice!


This really is a very beginner friendly DIY project and requires minimal inexpensive supplies to accomplish.
You only need two things to make the actual “concrete mixture” itself! Say, what?
Supplies needed
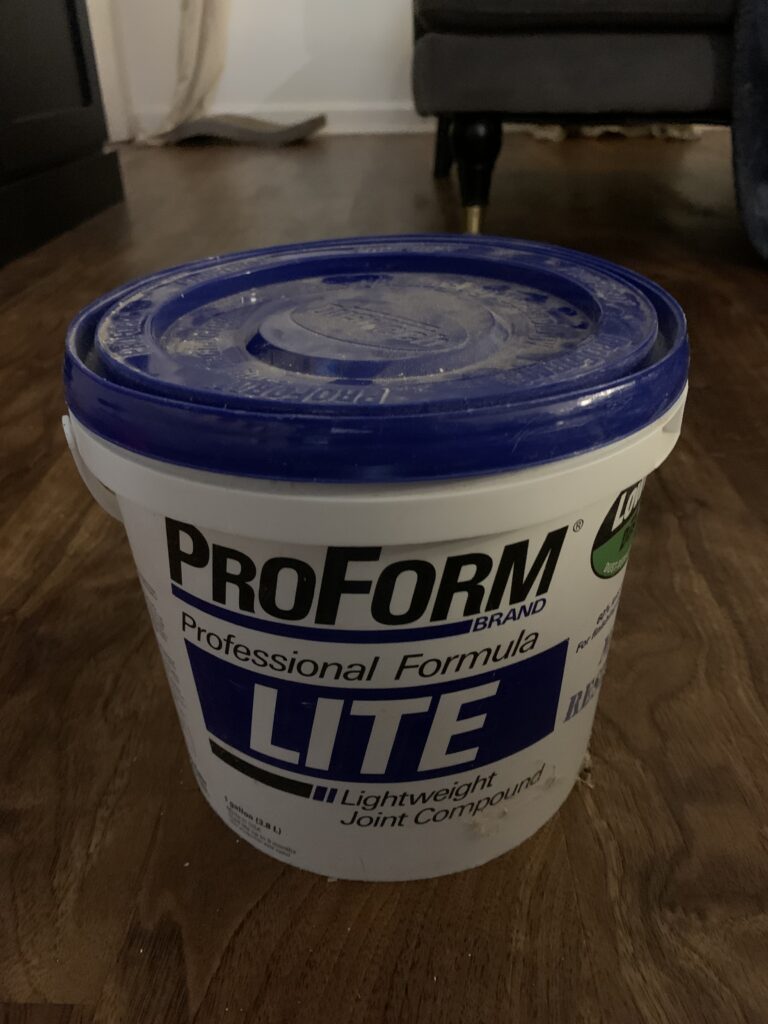
- Drywall mud/joint compound
- latex paint (tinted in the color of your choice)
- Drill
- Mixing paddle attachment (for drill)
- Tall narrow bucket
- Putty Knife Kit (to apply mud mixture with)
- 220 or higher sanding sponge


How to make and choose a color…
I was going for more of a concrete finish for our fireplace. Getting my concrete mixture to be as close to a natural concrete gray as possible was my goal.
The key to choosing color with this technique is buying the darkest version of the color you want. During the process to mix the concrete mixture with the proper ratio of supplies, the end product color will be very diluted and much lighter compared to its original color.
When you go look at paint colors and see a light color you like, I suggest that you pick the darkest paint color on that same card to use to get the lighter color look in the end.
For our project specifically, I used Sherwin Williams Tricorn Black to achieve this light concrete gray look.
Step-by-step for making the DIY Concrete Mixture:
- Mix, 1 part paint and 2 parts joint compound/drywall mud
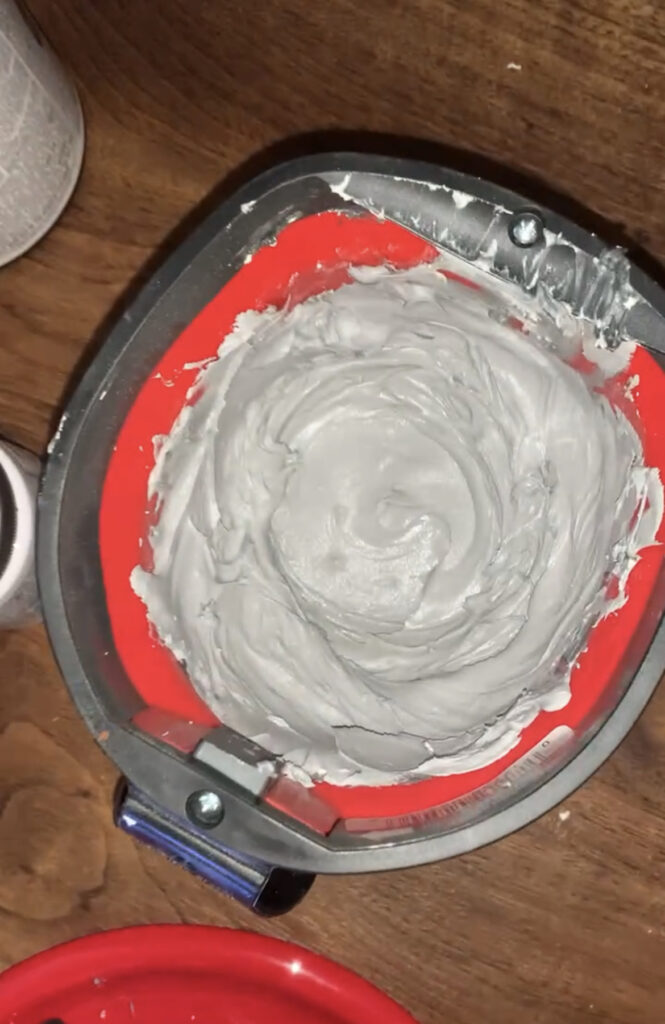
- With a mixing paddle attached to a drill mix the 2 ingredients together in a tall narrow bucket.
- Make sure to mix thoroughly so there won’t be any color variation when applied to the surface.

How to apply…
You will need a plastic putty knife and the size of it is dependent on how much surface area you are covering. If you are covering a huge wall use a larger 6” putty knife. Smaller projects and surfaces you can use a 2” or 3” putty knife.
The consistency of the mixture should be similar to greek yogurt, maybe a little thicker. You want to be able to spread the mixture in thin layers on the wall without it falling off or dripping.
For the first coat, take your spatula and get some of the mixture on it and start applying in small strokes to your flat surface.
The key to making this technique really look amazing is working with small batches and small sections.
When you apply the “concrete mixture” make sure you are spreading a thin layer of the concrete mixture on your surface in all different directions. That is what will give you the varied look that makes this texture so gorgeous.
Make sure to apply a second coat. It’s the best way to make sure you have good even coverage all over.
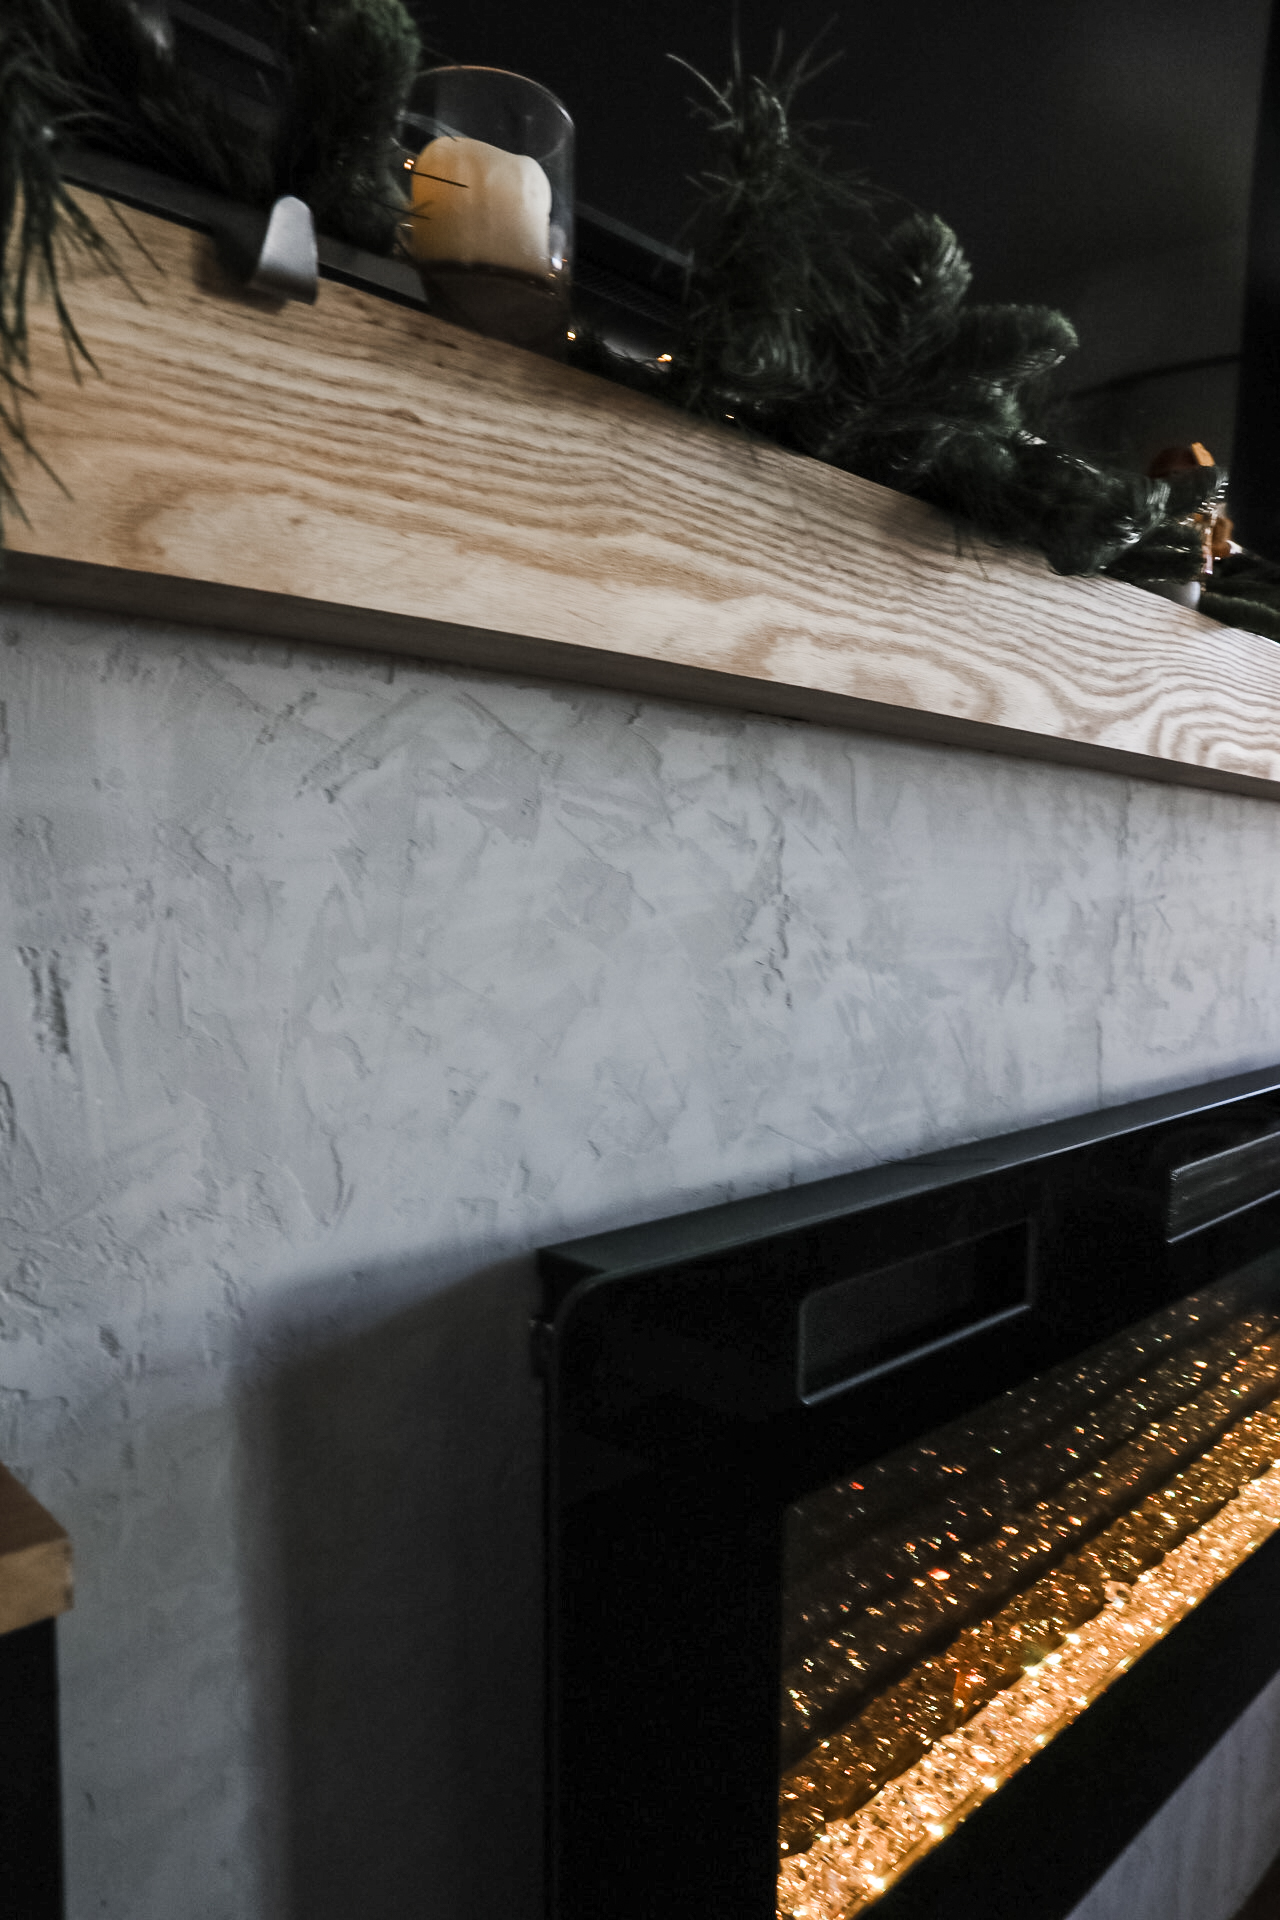
As you can see below we covered the entire fireplace surround with the concrete mixture.

Finishing your DIY Concrete Fireplace
Once you have the area all done and you are happy with the texture, you’ll want to let it dry overnight minimum before you move onto the next step.
Make sure the next day that the texture is all dry before you start the sanding process. You’ll want to get a 220 grit sanding sponge for this step.
The sanding process is going to be to your liking with how much you do or do not sand. You can just leave it exactly as it is if you want the whole thing to have that harsher look.
The sanding knocks off all the high spots and goobers as I call them and gives you a softer texture. It also gives this gorgeous natural look of a concrete finish when you sand the entire surface down.
When sanding the main goal is to sand only a little bit to knock off any rough sharp lines. You aren’t trying to get it to a smooth finish, this is meant to have a lot of texture and depth in your final product.
Sealing it at this point is optional. Some people say to seal it and others say don’t. I chose not to seal mine because it is not in a wet area or high traffic.
Putting this texture in a wet area or high traffic area might benefit from being sealed to last a long time and hold up to wear and tear.
Here is a water based sealer you can use if you decide that is what you want to do for your project. Keep in mind the sealer will change the final look and possibly darken it. Maybe test the sealer on a sample piece separate from your project to confirm you like the look first.
Before you go…
You can see the entire fireplace finished in our living room with the electric fireplace and how the concrete look pulled the entire space together here!!!!
Our new fireplace is the perfect fit for our new home living room and makes for a stunning focal point.
If or when you do this DIY Concrete Fireplace/Faux Concrete Fireplace, I’d love for you to tag us on Instagram so I can see what you create!
COZY HOME, COZY RECIPES:
Every cozy home deserves amazing recipes, and it’s even better when those recipes are both delicious and healthy. Our goal is to provide tasty meals that are easy to make, regardless of your skill level.
Fast, easy meals leave more time for fun activities, making your home a hub of joy and good food.
CONNECT WITH US:
As always, we love hearing about your experiences with our “DIY Concrete Fireplace Tutorial”. Reach out to us through our social channels. Any questions you have, we’re here to answer.
Stay updated by joining our newsletter, offering a monthly dose of new recipes and a first look at upcoming projects.
MORE COZY KITCHEN RECIPES:
If you’re hungry for more, explore our collection of Cozy Kitchen Recipes. Another healthy favorite is the “Sausage Potato Veggie Bake.” Find these recipes and more here.
DIY RESOURCES:
For additional resources, check out our DIY Tutorials, offering a wealth of information to enhance your home improvement skills.


Do you think this will work over old tile?