


Upgrade Your Walls Without Compromising Electrical Safety!
Have you ever added shiplap, tile, or paneling to your walls—only to find your electrical outlets no longer sit flush? If so, you’re not alone. That “sunken outlet” problem isn’t just annoying—it can be a real electrical hazard if left unaddressed. So, let’s avoid the hazards and do it right with this how to install electrical outlet extender tutorial!
Luckily, these electrical outlet box extenders are an affordable and easy DIY fix. These simple plastic spacers bring your outlet forward to match the new depth of your wall, making your outlets not only look better but also meet electrical code.
If you’re planning a wall upgrade or already have one installed, this step is often overlooked. But don’t worry—this blog walks you through how to install an electrical box extender in just a few minutes with basic tools. Let’s dive into what you need to know before getting started.
Why Recessed Outlets Are a Problem (And When You Need an Extender)
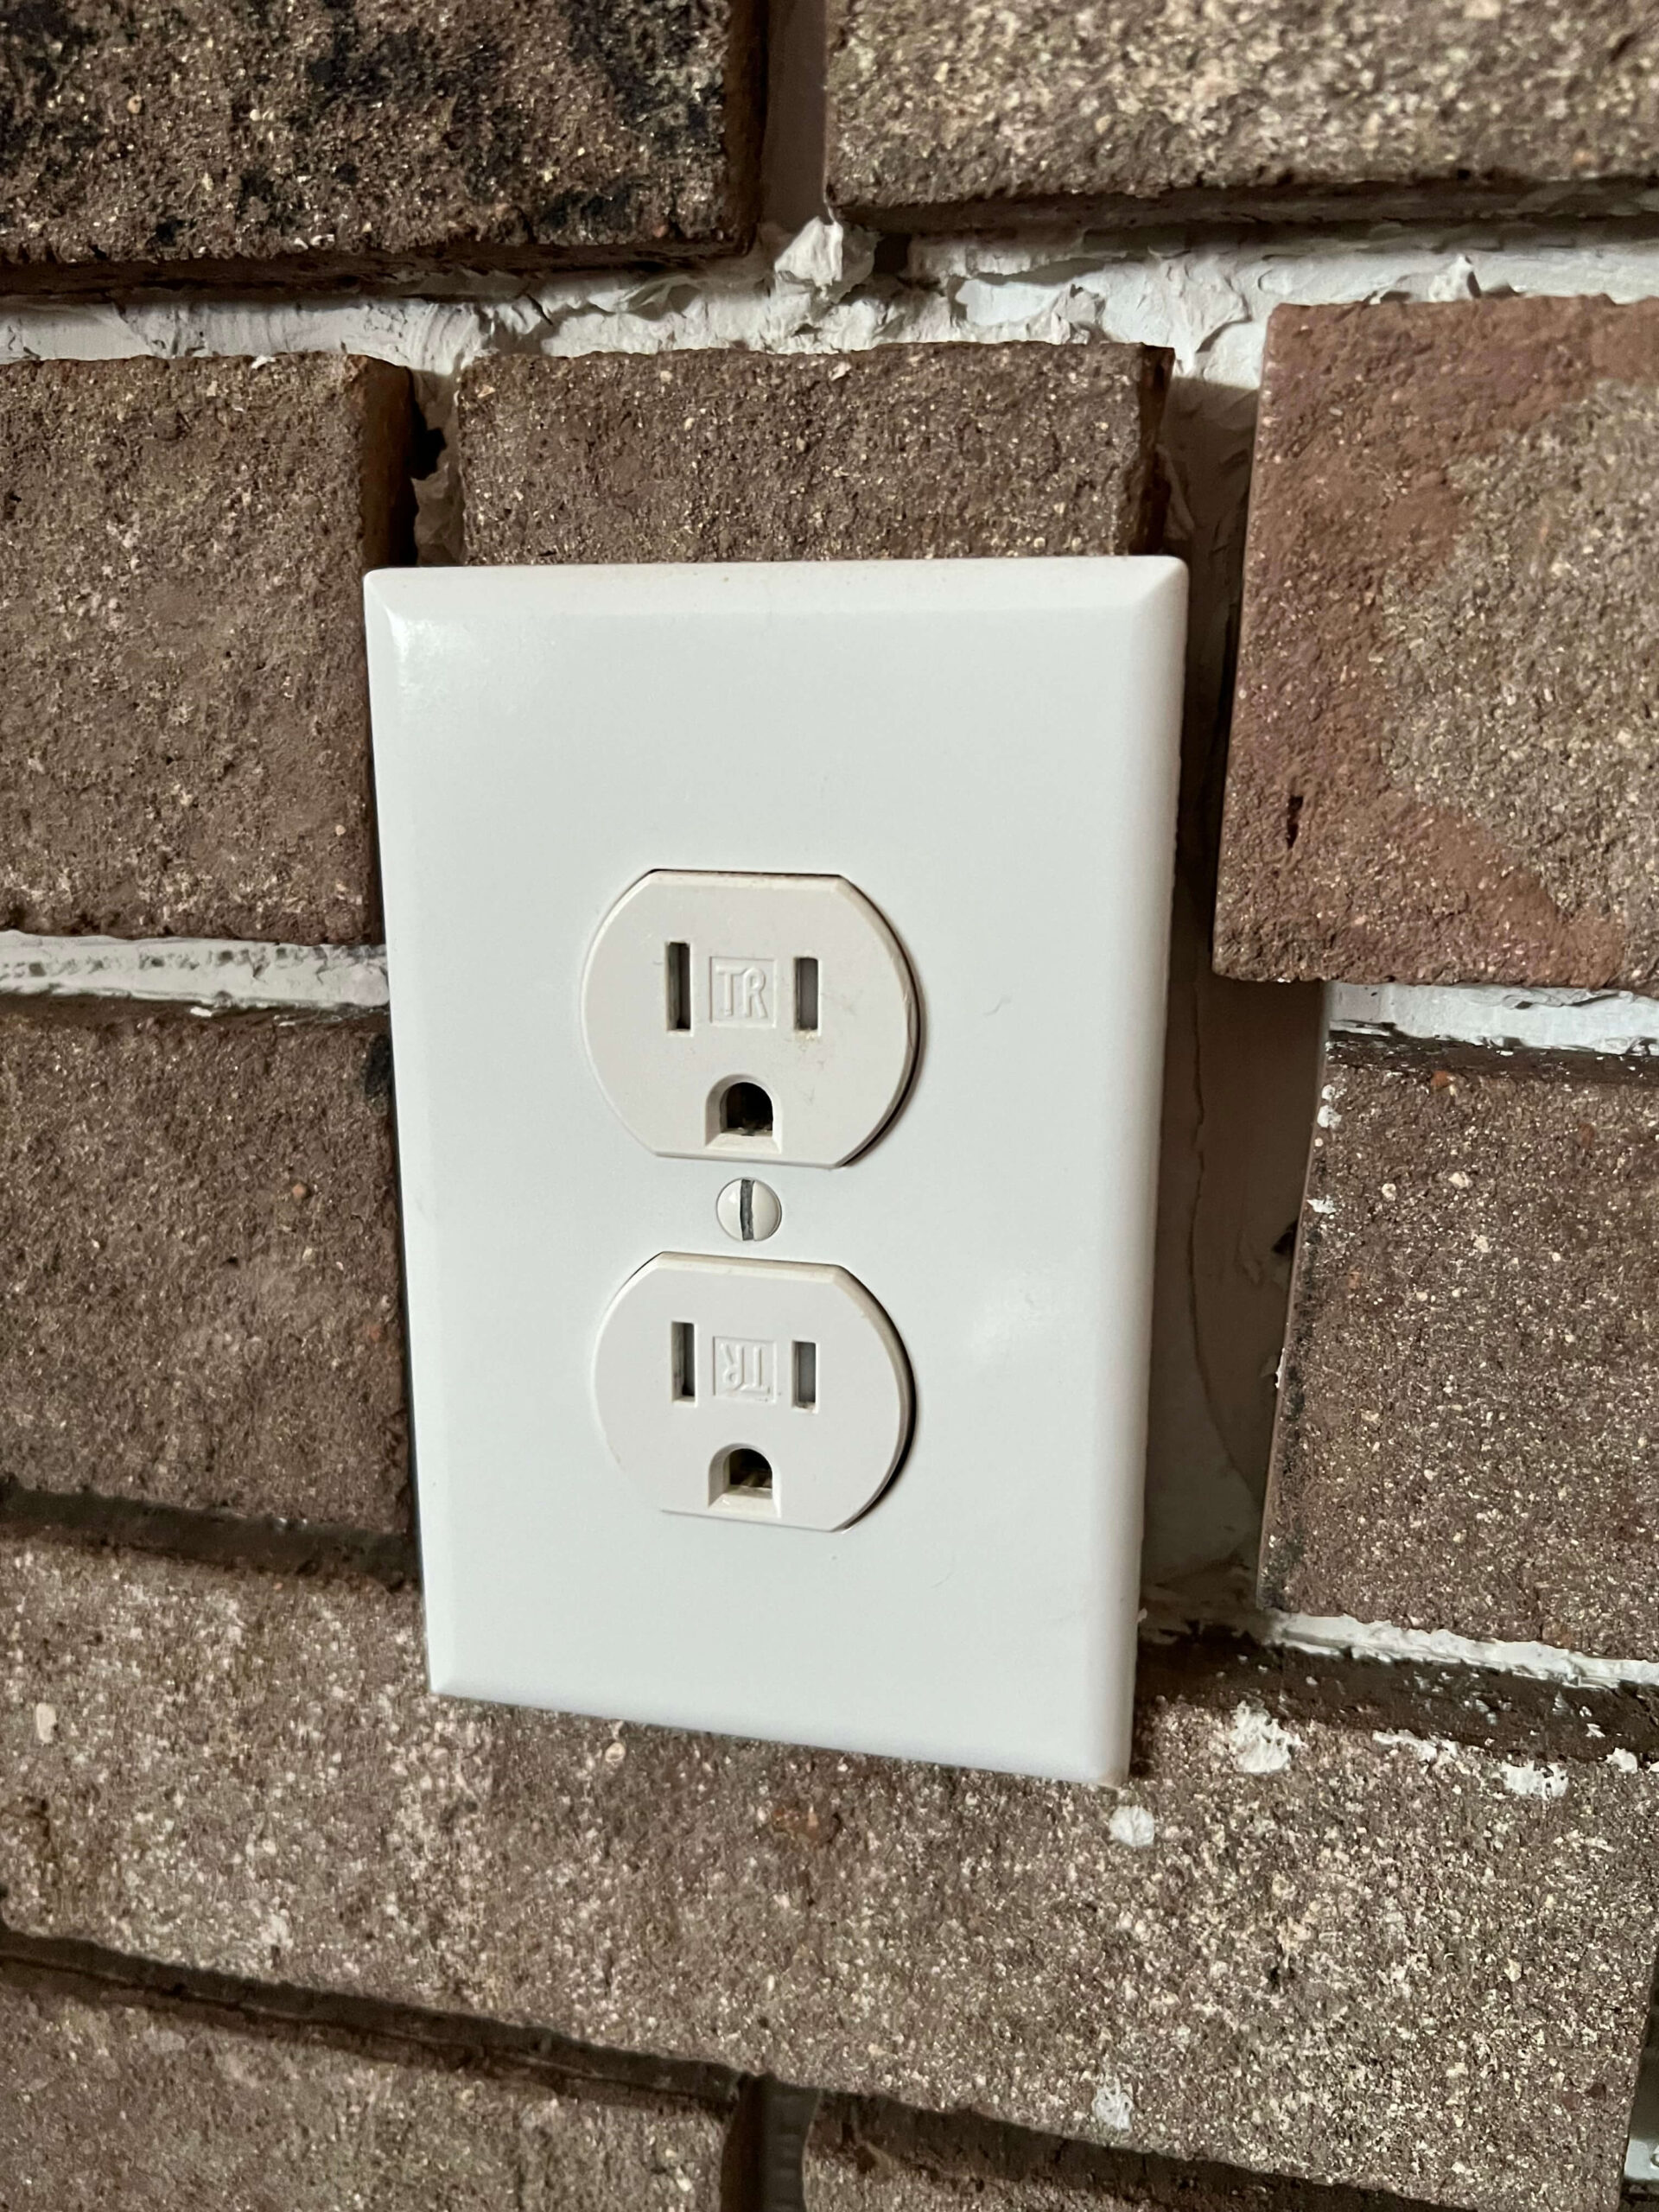
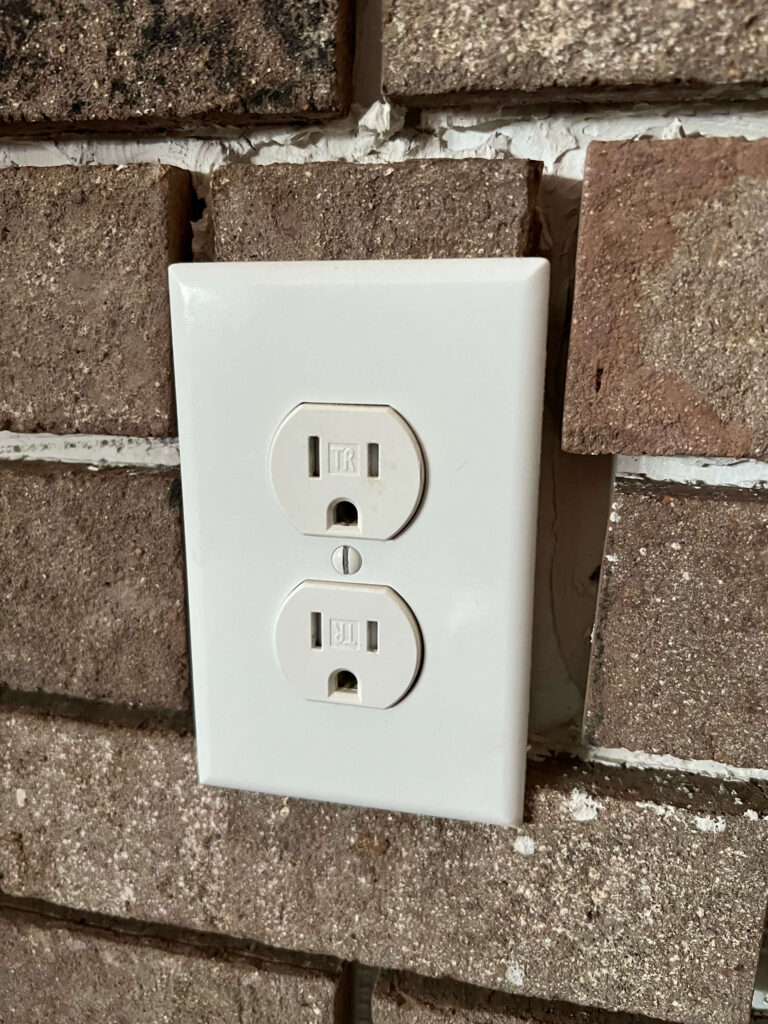
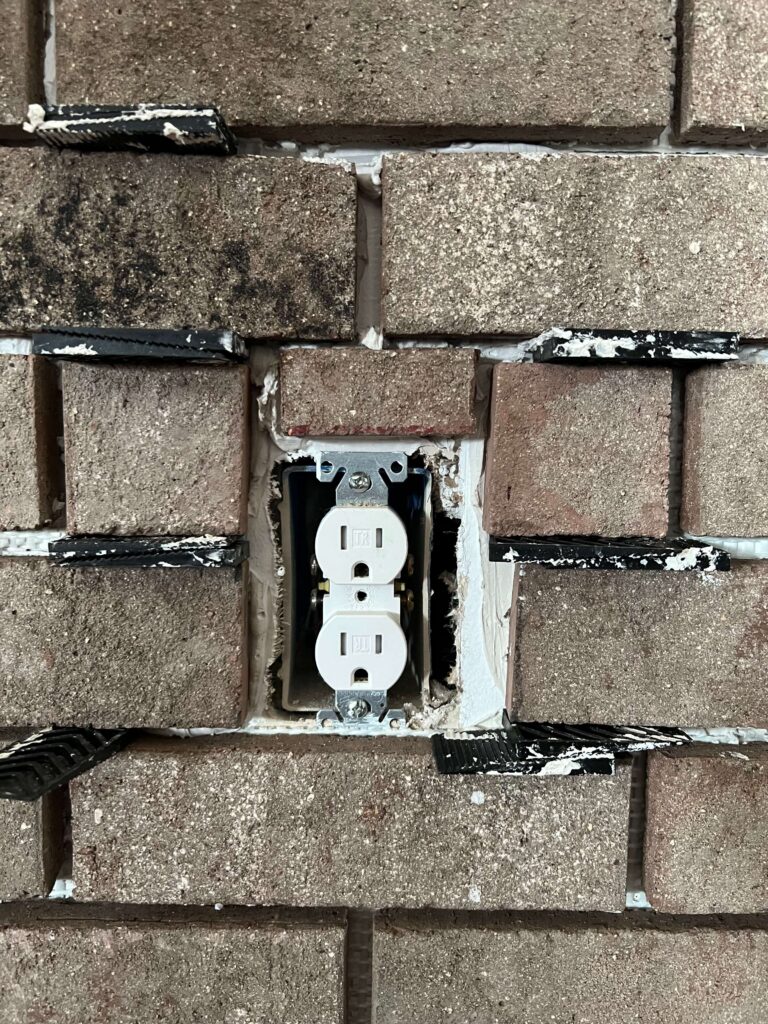
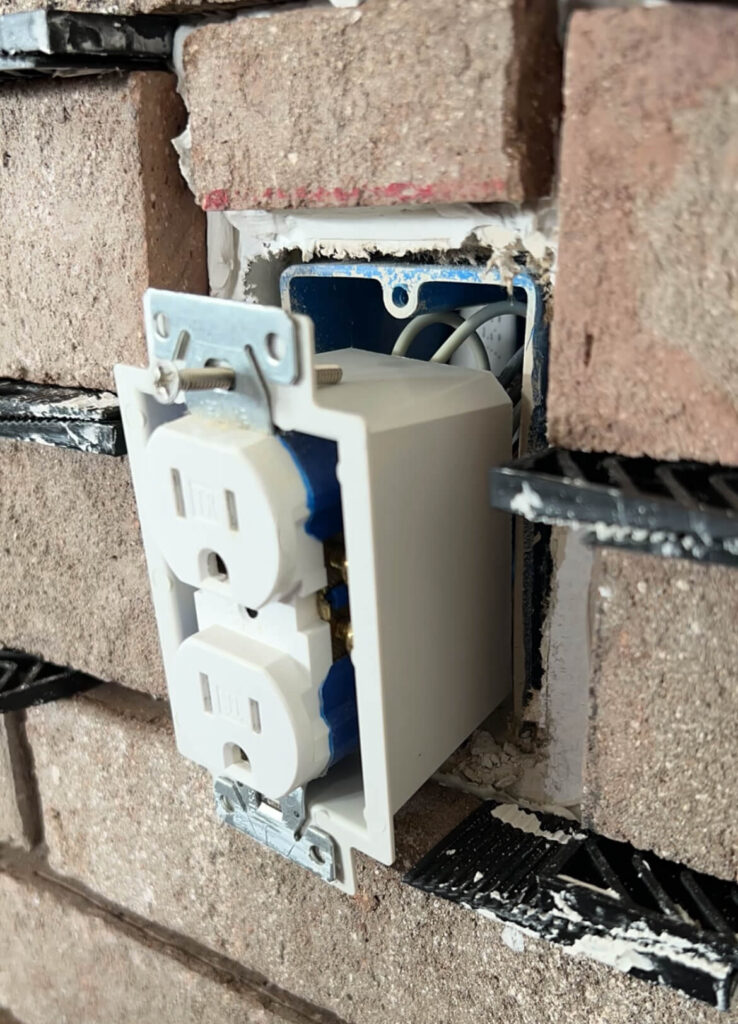
When you install wall treatments like tile backsplash, beadboard, or shiplap, you’re increasing the thickness of your walls—usually by ¼” to ¾”. That pushes your current outlets/electrical boxes deeper into the wall cavity. If you reinstall the outlet cover over a recessed outlet without extending it, it creates a gap between the outlet and the outlet cover plate.
But here’s the real issue: a recessed outlet like this often leads to loose or floating outlets, which can cause wiring stress, exposed conductors, and even spark risks if the terminals touch metal or combustible material. This violates the National Electrical Code (NEC 314.20), which requires that electrical devices be flush with or project slightly from the finished surface.
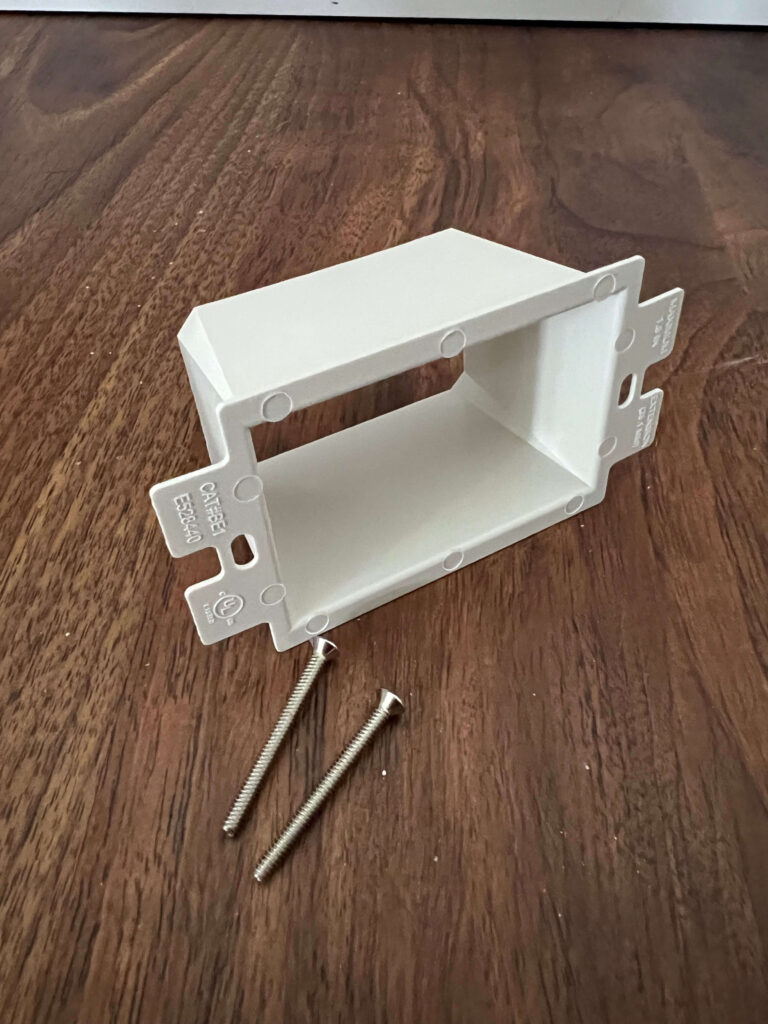
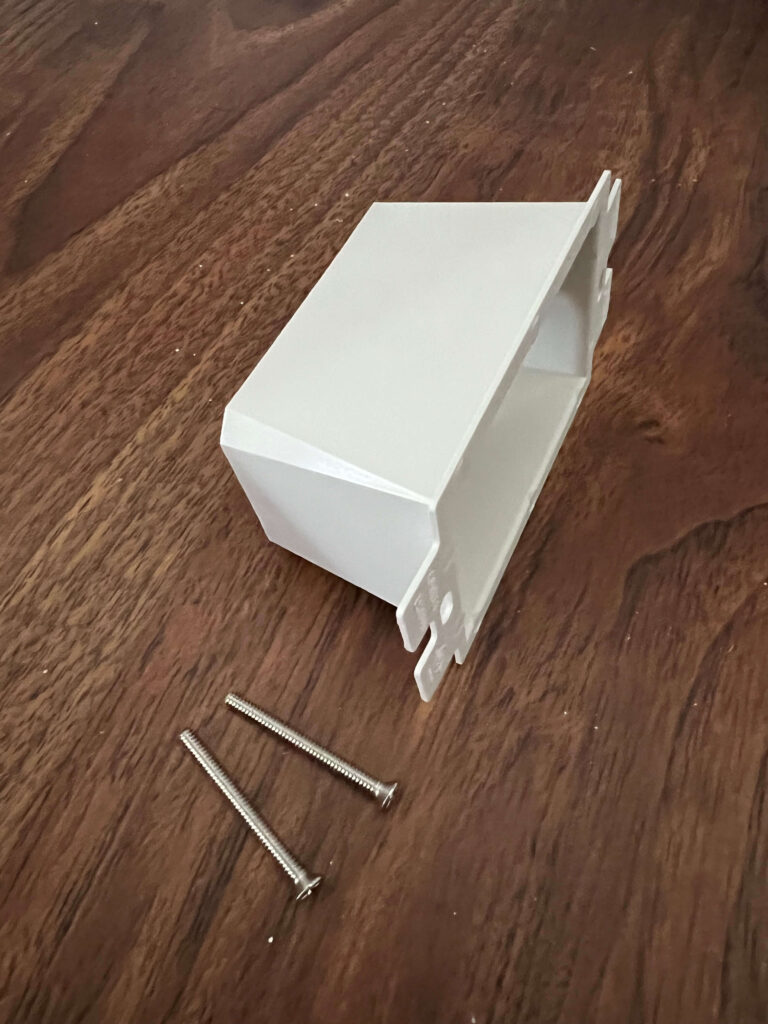
Outlet extenders, also called electrical extender box or spacers, solve this problem. They’re made from non-conductive materials and are designed to safely bridge the gap between your outlet and the newly built-out wall surface. They’re affordable (usually under $10 for a 5-pack) and come in different depths, like the popular 1/2-inch or 1-inch extenders.
You’ll need an Electrical Outlet Extender if:
- You installed tile, paneling, or shiplap that makes your outlet sit too far back
- Your outlet wiggles or doesn’t feel secure
- The faceplate doesn’t sit flush against the wall
- You want your outlets to be up to code
What You Need to Know Before Installing an Outlet Extender
Before jumping in, it’s helpful to understand a few quick things about safety and supplies. This project is beginner-friendly, but you’ll be working with electrical components, so safety always comes first.
Tools and Materials You’ll Need:
- Outlet extender (choose the right depth) – I use this one from Amazon
- Screwdriver (flat or Phillips depending on your outlet)
- Voltage tester (to ensure the power is off)
- Optional: wire nuts or pliers, if wires need slight adjustment
- Longer Screws (some extenders come with longer screws and some don’t)
Safety First: Turn Off Power
Go to your breaker box and turn off the power to the outlet you’re working on. Use a non-contact voltage tester to double-check that the wires are not live before you remove the faceplate.
Choosing the Right Extender
Measure how far your outlet is recessed. Extenders usually come in standard depths (⅛”, ¼”, ½”, and 1″), so choose one that brings the outlet flush with your new surface. You can stack spacers if needed, but one solid piece is more secure.
If you’re doing multiple outlets at once (common when doing a full wall), go ahead and buy a multi-pack—you’ll save money and time.
How to Install an Outlet Box Extender: Step-by-Step Tutorial
Now that you’re ready, here’s how to install your outlet extender safely and easily:
Step 1: Turn Off the Power
This can’t be stressed enough—always cut power at the breaker before working on any electrical outlet.
Step 2: Remove the Faceplate
Use your screwdriver to remove the outlet cover.
Step 3: Test for Voltage
Use your voltage tester to ensure the wires aren’t carrying current. Safety first!
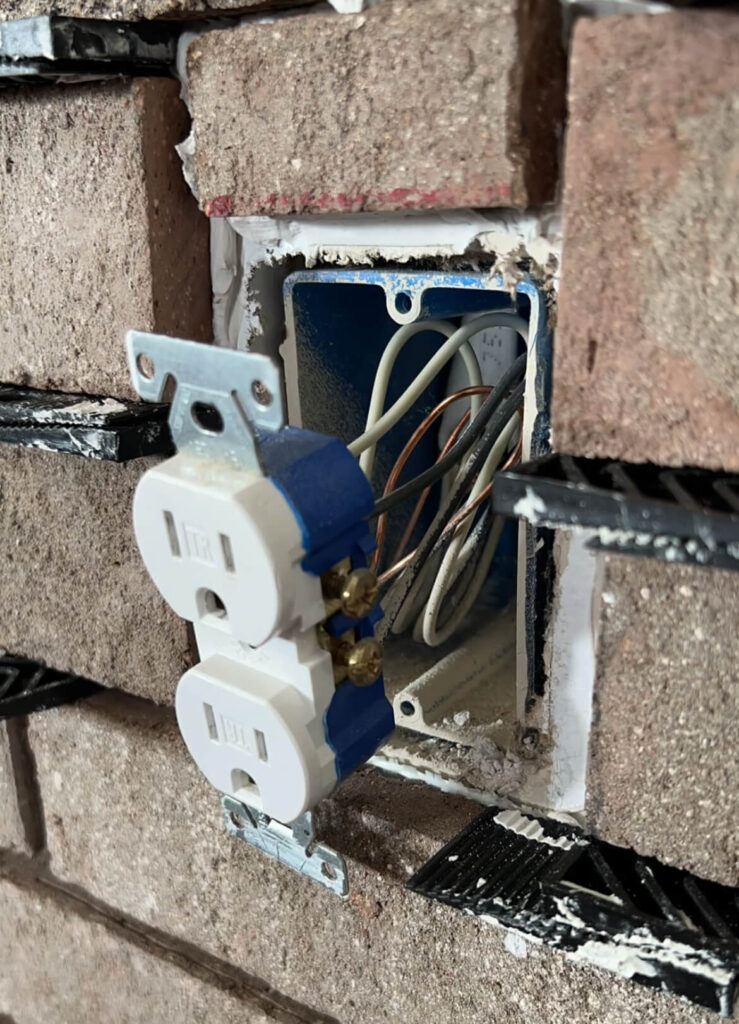
Step 4: Unscrew and Loosen the Outlet
Unscrew the two screws holding the outlet to the electrical box. Gently pull the outlet out enough to give you room to work, but be careful not to disconnect or overly strain the wires.

Step 5: Slide on the Outlet Extender
Position the outlet extender over the box opening. It should sit flush with your finished wall surface. Some extenders have adjustable tabs to help secure them in place.
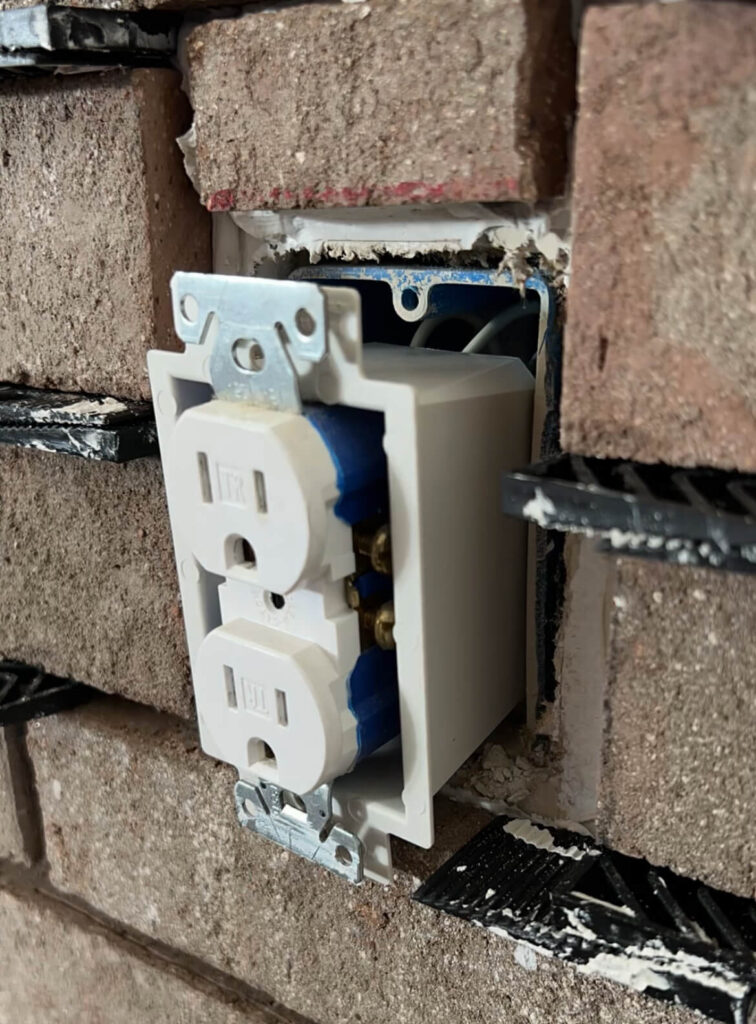
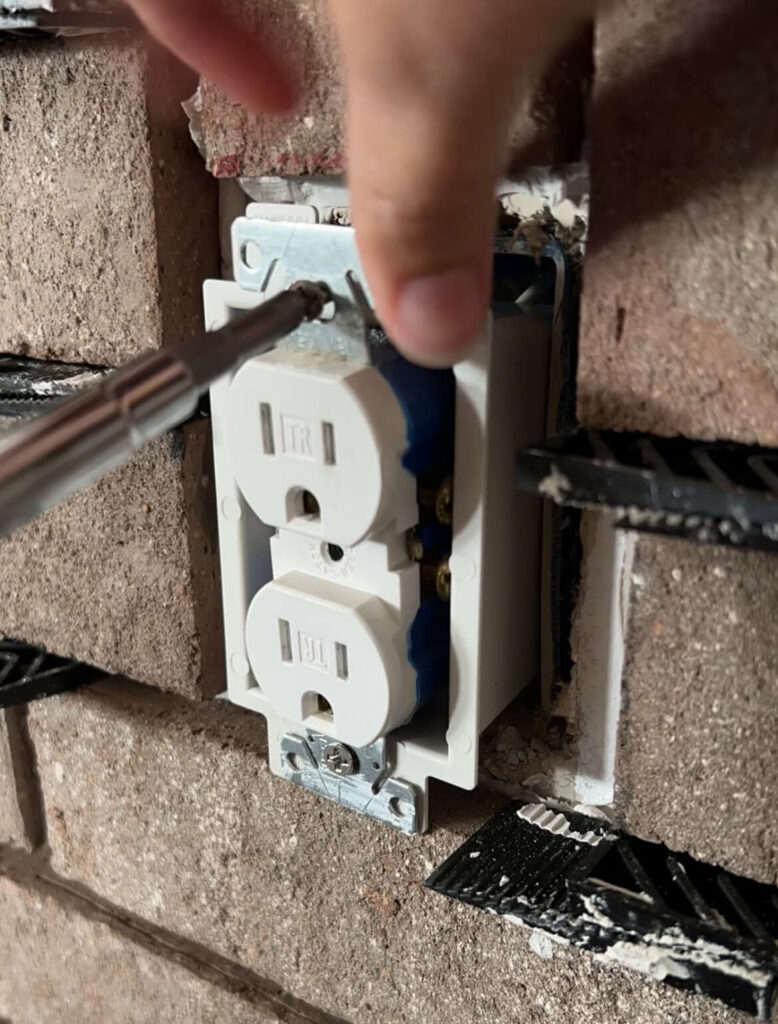
Step 6: Reattach the Outlet
Line up the outlet with the extender and screw it back in. Make sure it’s snug and sits flush with the wall.
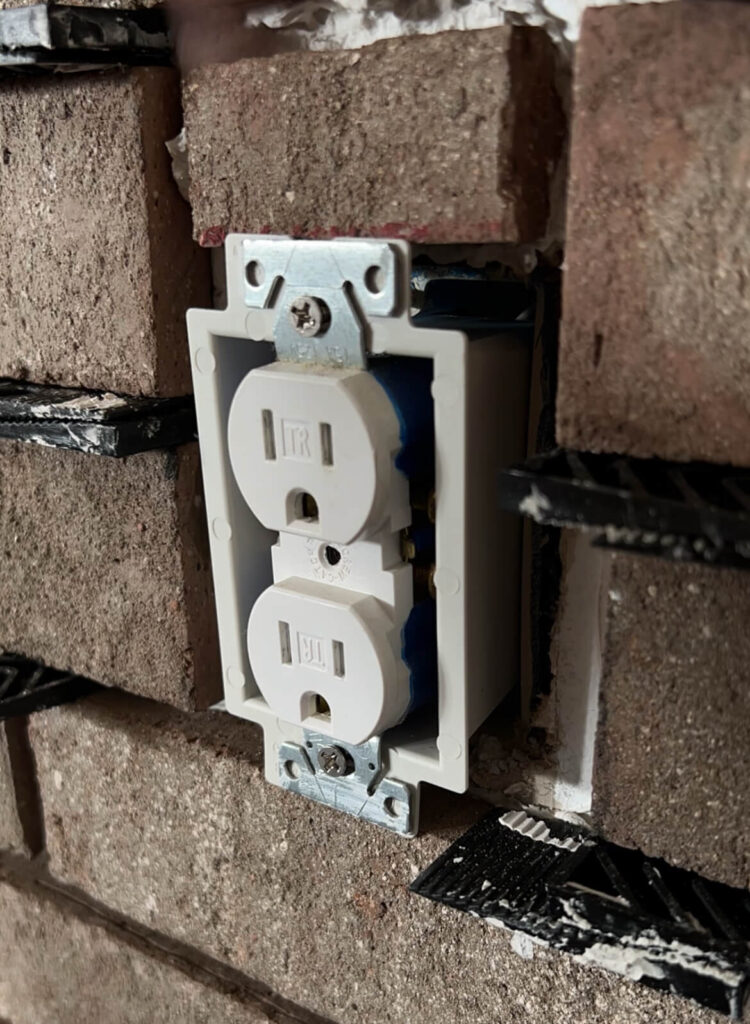
Step 7: Replace the Faceplate
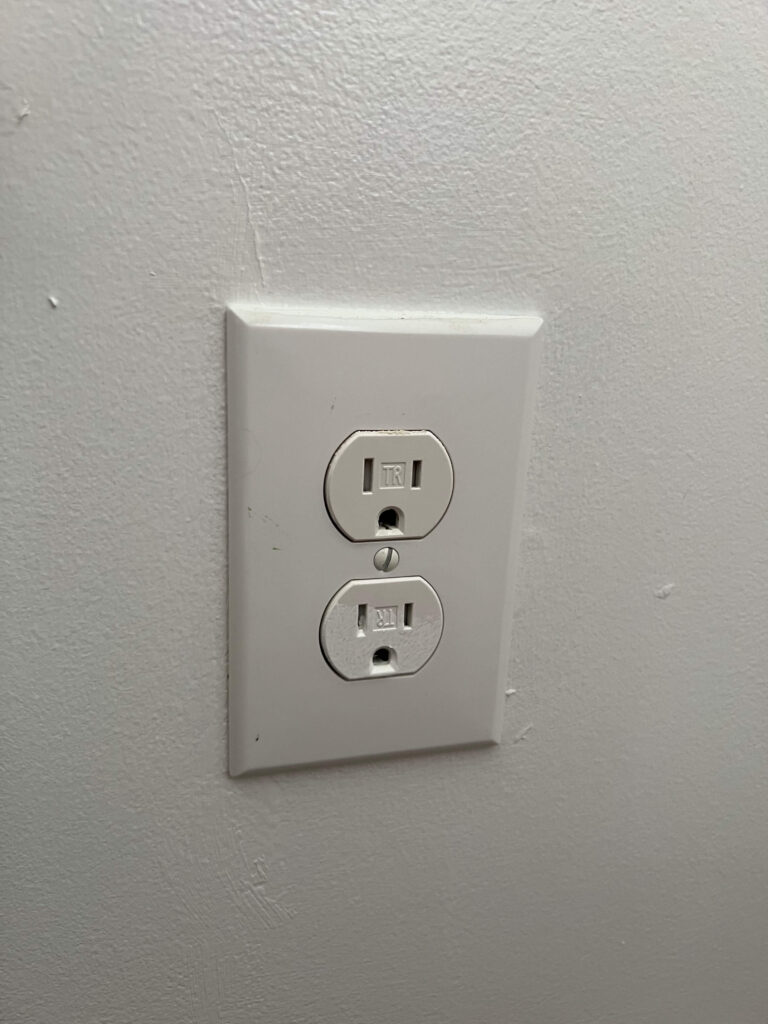
Snap or screw your outlet cover back into place. Everything should now look clean, aligned, and secure!
Step 8: Restore Power
Head back to the breaker and turn the power back on. Test your outlet to make sure it’s functioning properly.
That’s it! In less than 10 minutes, you’ve improved both the safety and appearance of your wall upgrade.
Final Thoughts + Your Next DIY Step
Installing an outlet box extender is a small step that makes a big difference in your next DIY wall upgrade. Whether you’re adding tile, shiplap, or beadboard, don’t skip this crucial detail. It not only gives your outlets a polished, professional look—it also helps your home meet electrical code and stay safe.
Biggest takeaway? If your outlet isn’t sitting flush after a wall update, an extender is the fastest and easiest fix.
Next Steps:
- Need help choosing tools? Check out my full list of beginner-friendly DIY tools here.
- Follow me on Instagram @buildacozyhome for daily DIY tips and tutorials!
If or when you do try our How to Install Electrical Outlet Extender: Easy Beginner DIY. I’d love for you to follow us and tag us on Instagram so I can see your DIY project finished results! Happy DIYing!
COZY HOME, COZY RECIPES:
Every cozy home deserves amazing recipes, and it’s even better when those recipes are both delicious and healthy. Our goal is to provide tasty meals that are easy to make, regardless of your skill level.
Fast, easy meals leave more time for fun activities, making your home a hub of joy and good food.
CONNECT WITH US:
As always, we love hearing about your experiences with our “How to Install Electrical Outlet Extender: Easy Beginner DIY”. Reach out to us through our social channels. Any questions you have, we’re here to answer.
Stay updated by joining our newsletter, offering a monthly dose of new recipes and a first look at upcoming projects.
MORE COZY KITCHEN RECIPES:
If you’re hungry for more, explore our collection of Cozy Kitchen Recipes. Another healthy favorite is the “Sausage Potato Veggie Bake.” Find these recipes and more here.
DIY RESOURCES:
For additional resources, check out our DIY Tutorials, offering a wealth of information to enhance your home improvement skills.

